How to Install Artificial Grass: Step-by-step
Installing artificial turf on dirt is absolutely doable – and honestly, it’s one of the most common scenarios we see at Site Prep. Proper ground prep. You can’t just roll fake grass over your existing soil and call it a day (trust me, I’ve seen those DIY disasters in my neighbourhood). What you need is a solid base layer – typically 2-4 inches of compacted crushed stone or road base – plus a weed barrier, proper drainage slope, and careful attention to detail during the fitting process.
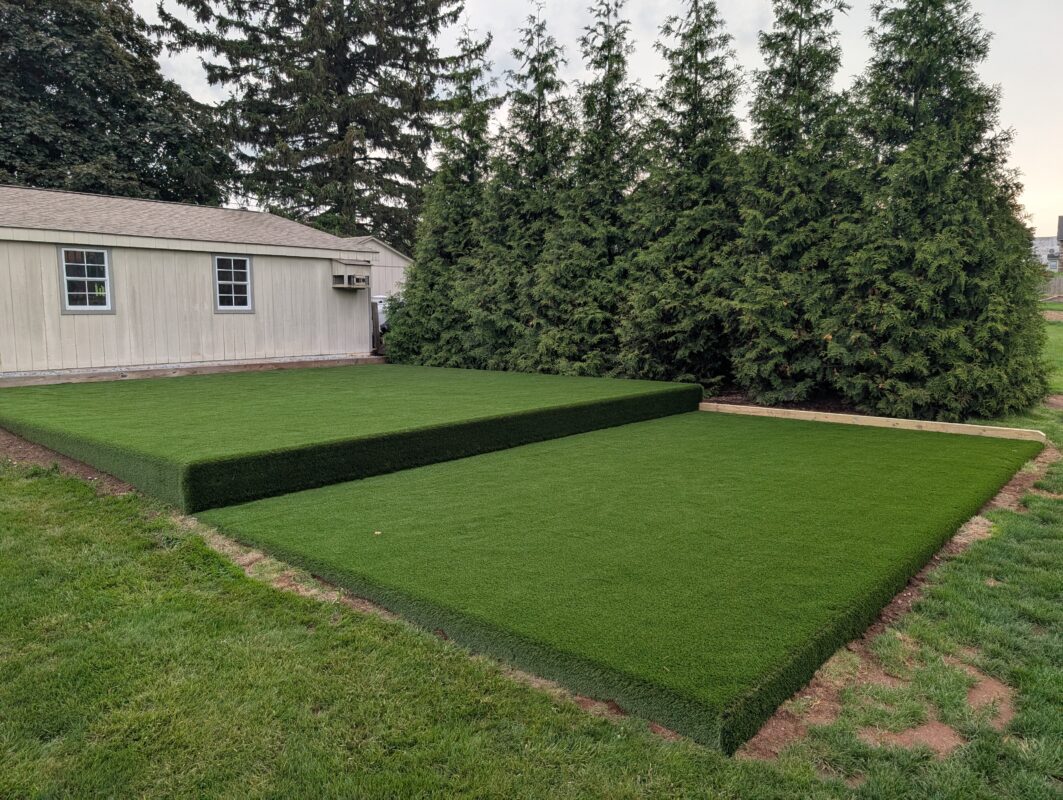
Think of synthetic grass installation as building a foundation. Skip steps, and you’ll end up with wrinkles, poor drainage, weeds poking through, or – worst case – turf that shifts and buckles after a few months. But do it right? Your backyard transforms into a lush, low-maintenance outdoor space that looks good year-round.
This guide walks you through the entire turf installation process – from measuring your area to that final satisfying brush of the synthetic grass blades. Whether you’re a seasoned DIY enthusiast or tackling your first major landscape project, you’ll find detailed instructions for each stage. Let’s get into it.
Table of Contents
Essential Tools and Materials for Artificial Turf Installation
Before you start digging up your yard, gather everything you need. Nothing’s worse than being halfway through a project and realizing you’re missing a crucial tool.
Tools You’ll Need for DIY Turf Installation
- Utility knife (get a sharp one – dull blades tear artificial grass instead of cutting cleanly)
- Measuring tape and chalk line for marking boundaries
- Rake and shovel for excavation and ground prep
- Plate compactor or hand tamper (rent the plate compactor for larger areas – your back will thank you)
- Power broom or stiff brush for final grooming
- Carpet kicker (optional but helpful for getting turf stretched properly)
- Hammer for securing turf nails
Materials Required for Synthetic Turf Install
- Artificial grass rolls (calculate 5-10% extra for waste and mistakes)
- Class II road base or crushed stone aggregate
- Weed barrier fabric (unless you have pets – more on that later)
- 5-inch galvanized turf nails (40D recommended)
- Seaming tape and adhesive for joining sections
- Infill material – silica sand, crumb rubber, or zeolite for pet areas
- Perimeter edging (optional but creates clean borders)
Step 1: Measure and Plan Your Artificial Turf Installation Area
Grab your measuring tape. Walk the perimeter of your installation area and record length, width, curves, obstacles. I mean
Sketch it out (doesn’t need to be architectural – a rough drawing works). Mark trees, sprinkler heads, raised beds, anything the turf needs to work around. Calculate your total square footage, then add that 5-10% buffer for cutting waste. Synthetic grass comes in rolls (usually 12 or 15 feet wide), so plan your layout to minimize seams. Fewer seams mean less work and a more natural look.
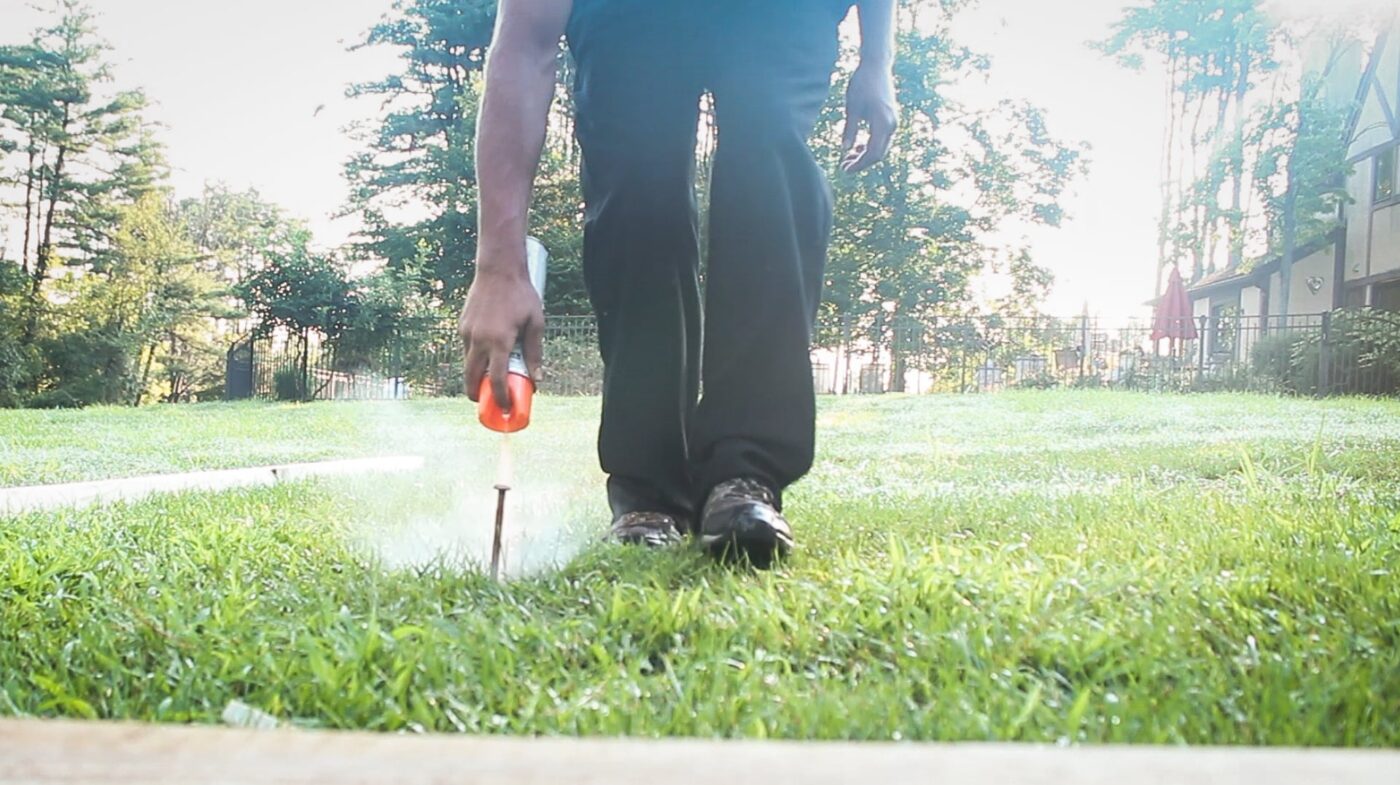
Use chalk or spray paint to mark your boundaries on the ground. This isn’t just for show – it helps visualize the final space and catches measurement errors before you’re committed. And hey, if you’re replacing an existing lawn with artificial turf, take before photos. You’ll want them later.
Pro tip: Check out our guide on Backyard Artificial Turf Ideas for design inspiration before you finalize your layout.
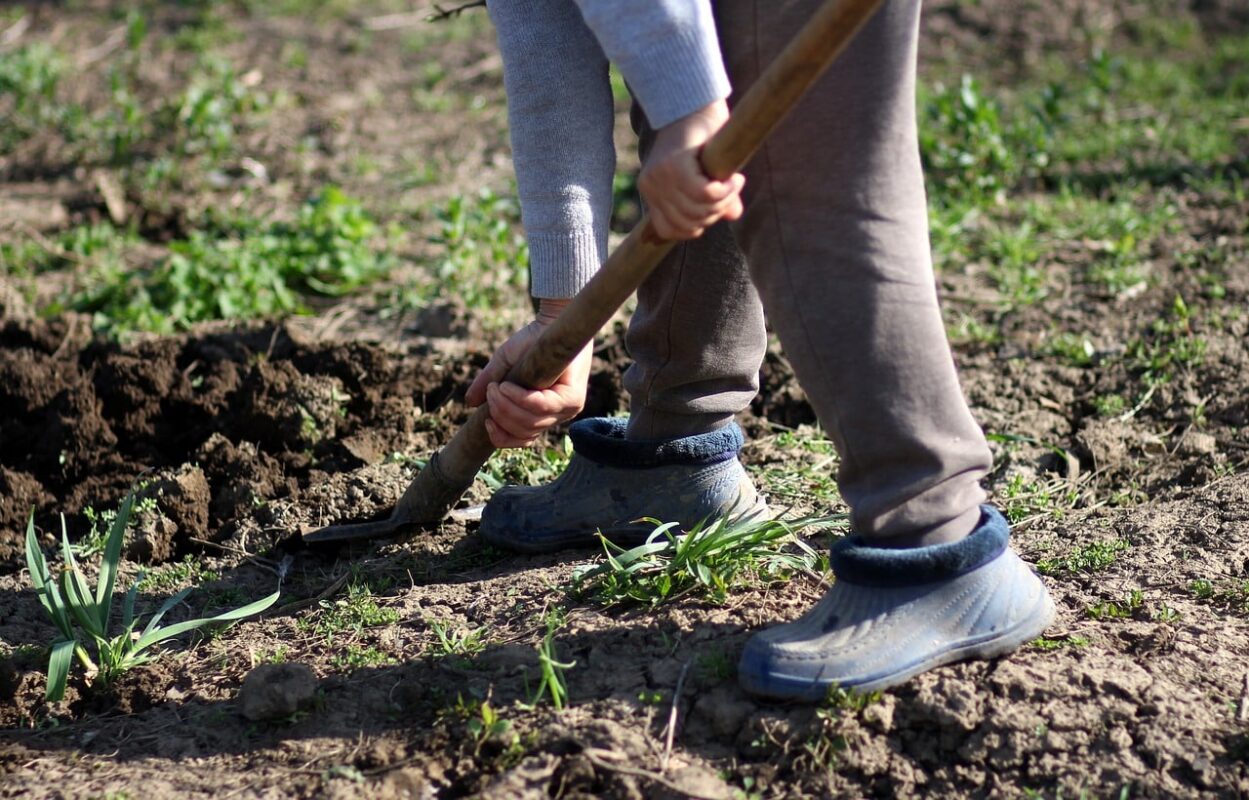
Step 2: Remove Existing Grass and Clear Debris
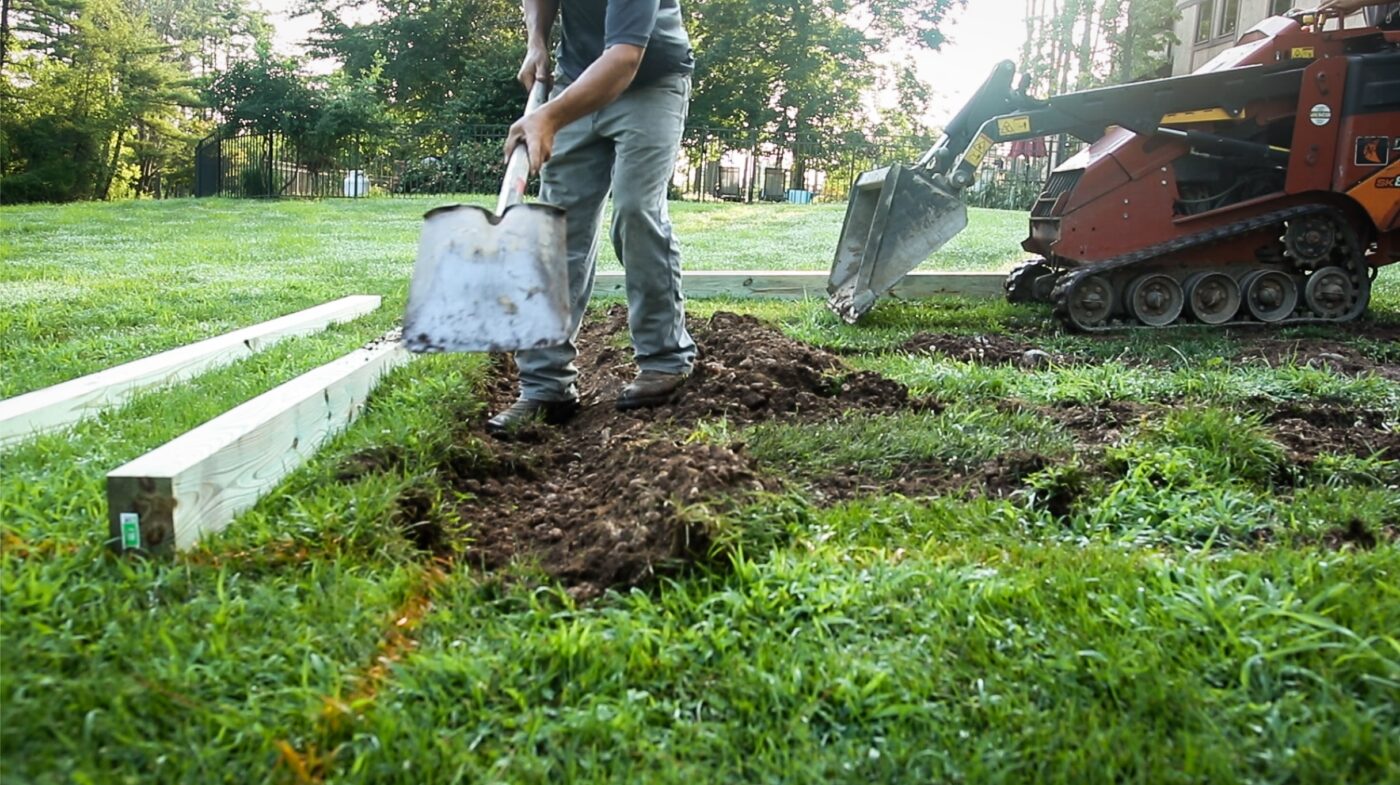
Time to dig. Use a shovel or sod cutter to remove the existing grass and vegetation down to bare soil. Get all the roots – leftover organic matter decomposes and creates uneven settling later. Not fun when your beautiful new astroturf develops random dips six months down the line.
Clear out rocks, debris, old roots, anything that could create bumps or drainage issues. I’ve seen people skip this step thinking “eh, it’ll compact down.” It won’t. You’ll feel every rock through the turf.
One critical detail: Call 811 before you dig. Seriously. Underground utilities (gas lines, electrical, water, fiber optic) run through residential areas. Hitting one turns your weekend DIY project into an expensive emergency. The service is free, and they’ll mark your yard within a few days.
Step 3: Excavate and Level the Dirt Surface
Excavate 3-4 inches below your desired finished grade. This depth accommodates your base material, the turf itself, and leaves room for proper drainage. Why so deep? Because when you compact the base layer, it settles – sometimes significantly. Start with more depth than you think you need.
Create a slight slope for drainage – aim for 1-2% grade away from structures. That means for every 10 feet, drop about 1-2 inches. Flat surfaces pool water, and water sitting on artificial turf backing degrades it over time. Remove high spots, fill low areas, get it as level as possible while maintaining that gentle slope.
Use a rake or screed board for initial leveling. Don’t obsess over perfection here – the base layer does most of the final leveling work – but get it reasonably smooth. Big undulations now mean big problems later.
Step 4: Install Weed Barrier Fabric
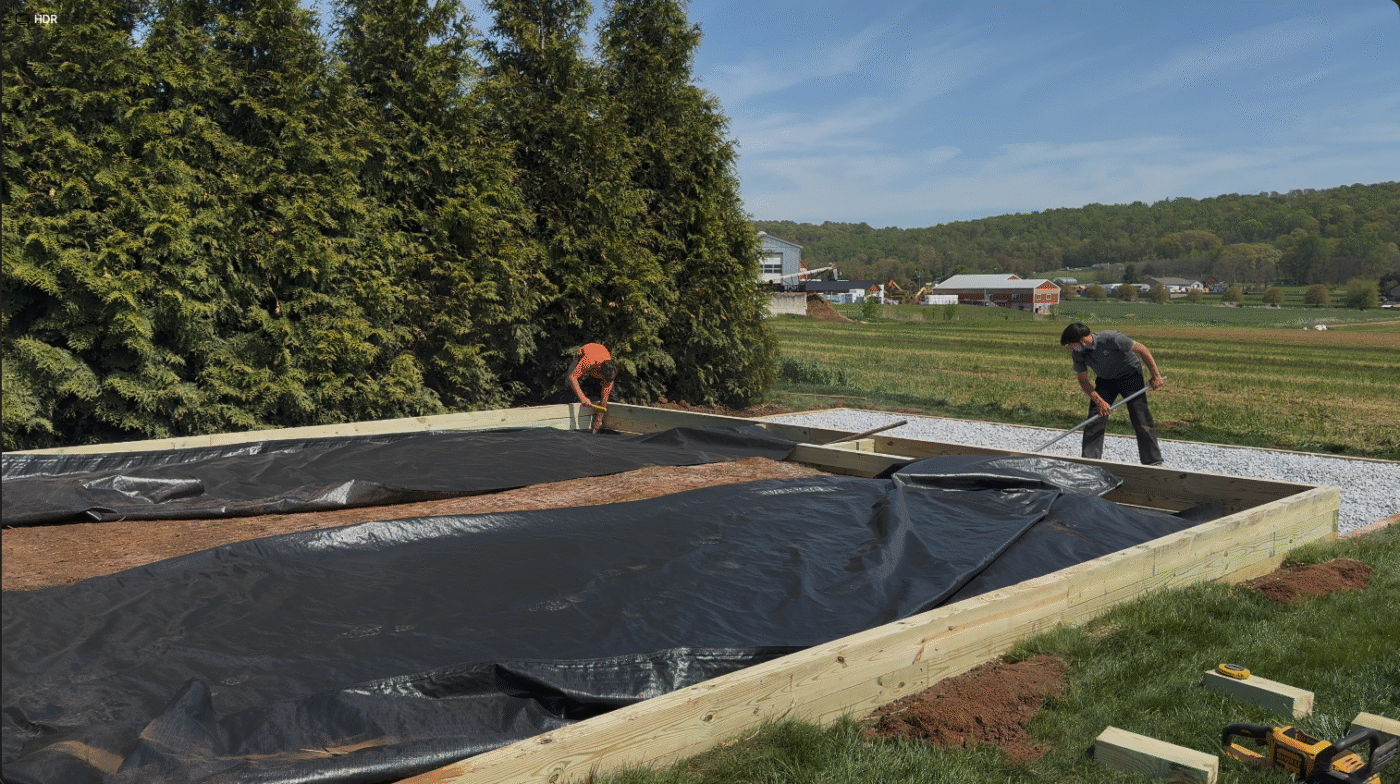
Roll out landscape fabric across your prepared soil. This barrier blocks weeds from pushing through while allowing water drainage. Overlap seams by 6-8 inches – gaps let weeds sneak through. Secure edges and seams with landscape staples every few feet.
Quick note about pets: Some installers skip weed barrier in dog areas because it can trap odors. Urine drains through astroturf and the base layer fine, but if barrier fabric prevents thorough flushing, smells build up. If you have dogs and plan to install on dirt, consider skipping the barrier or using a more permeable option. Your nose will appreciate it.
(And speaking of dogs, you’ll definitely want to read our article on How to Clean Fake Grass From Dogs – maintenance makes or breaks synthetic turf in pet areas.)
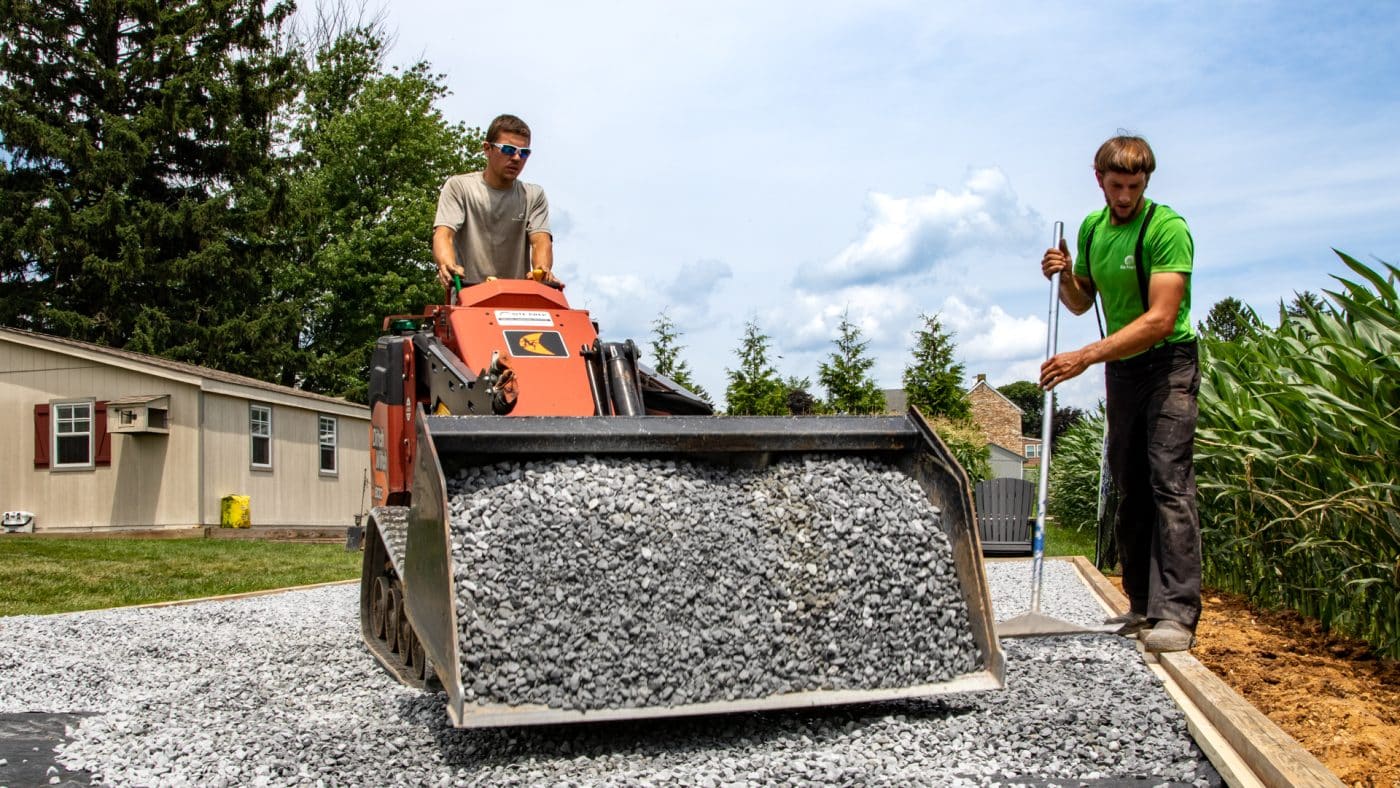
Step 5: Add and Spread Base Material
Here’s where preparing ground for artificial turf gets real. Your base material – typically Class II road base, crushed stone, or decomposed granite – is what actually supports the turf. Spread a 2-4 inch layer evenly across the entire area.
What’s the difference between materials? Road base compacts tighter and is great for high-traffic areas. Crushed stone (sometimes called crusher fines or crushed miscellaneous base) drains well. Decomposed granite works well in warm, dry climates. All work – just match your material to your climate and usage patterns.
Spread it evenly. Rake it smooth. Maintain that drainage slope. This is your foundation – literally. Corners cut here show up as permanent imperfections in your finished lawn.
Optional but recommended for some areas: Install gopher wire or pest barrier mesh under the base layer if rodents are common in your neighbourhood. Gophers can push up through turf, creating unsightly mounds.
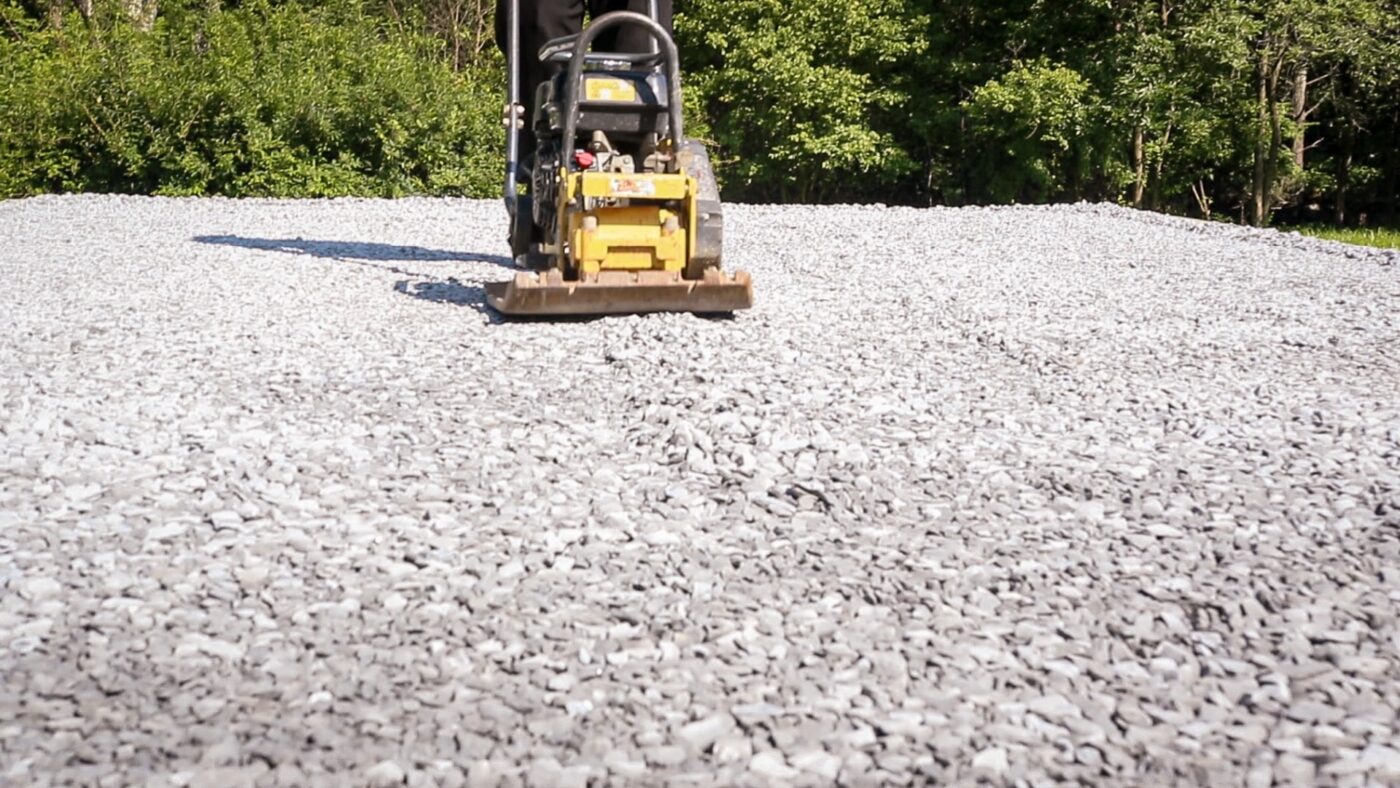
Step 6: Compact the Base Layer
Compaction is everything. Rent a plate compactor (vibratory compactor) for this step unless your area is tiny. Hand tampers work for small patches, but they’re brutal on anything over 100 square feet.
Lightly wet the base material before compacting – moisture helps particles bind and reduces dust. Not soaked, just damp. Run the plate compactor over the entire surface in multiple passes, overlapping each pass slightly. You want the base rock-solid, immovable. Jump on it. If it gives or shifts, compact more.
Check your drainage slope again. Measure with a level. Make corrections now, before the turf goes down. Once artificial grass is installed, fixing drainage issues means tearing everything up and starting over.
Stand back and look at your work. The surface should be smooth, firm, properly sloped. This is what you put under turf – a stable, well-draining foundation that won’t settle or shift.
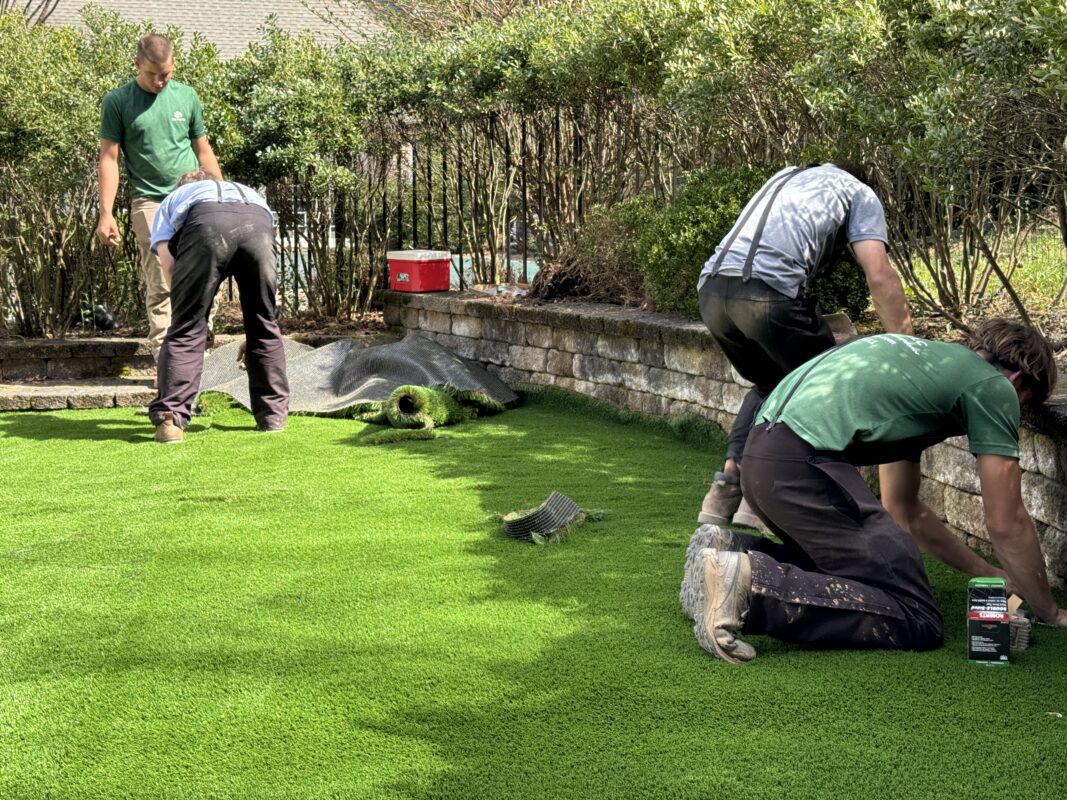
Step 7: Position and Roll Out the Artificial Turf
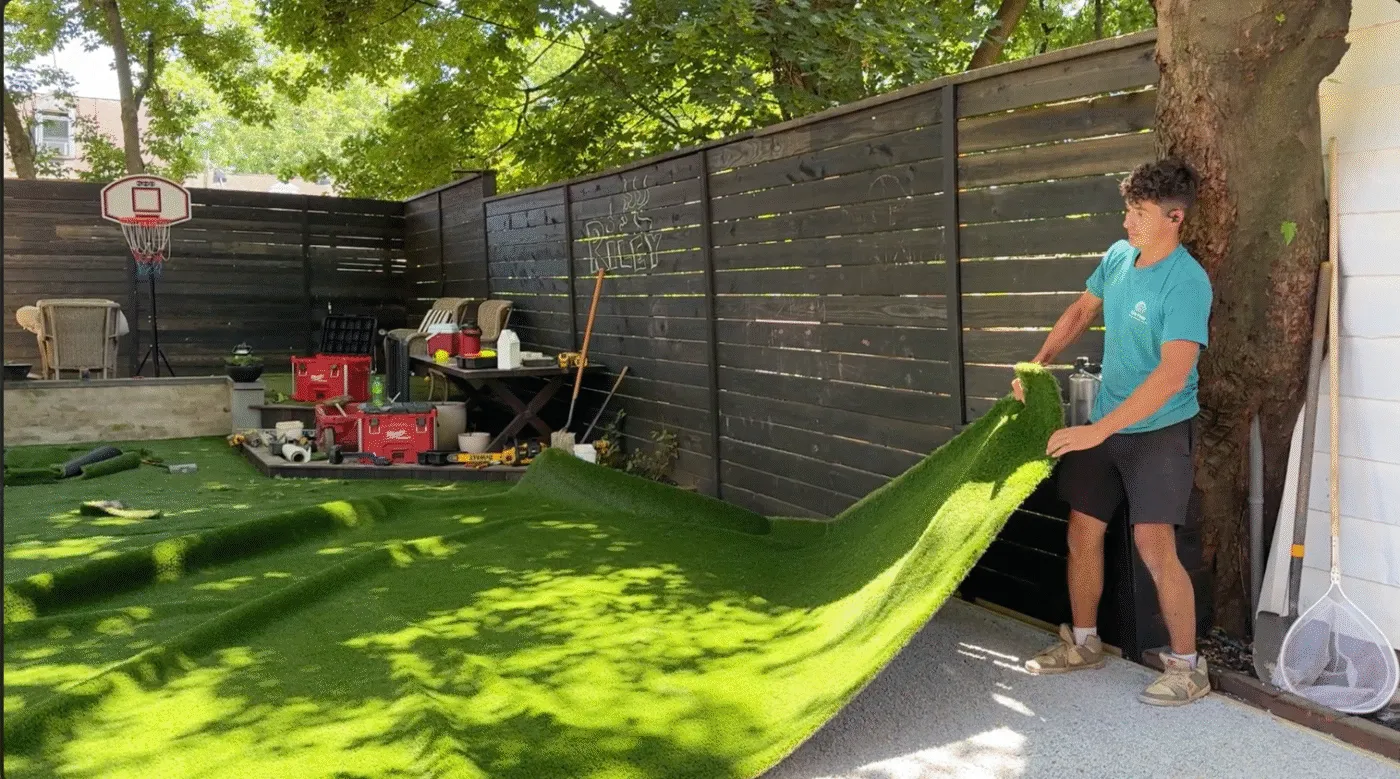
Finally – the fun part. Unroll your artificial grass carefully over the prepared base. Don’t drag it – lift and position it. Dragging shifts your perfectly compacted base and pulls up your weed barrier.
Let the turf relax for 30-60 minutes in direct sun if possible. Synthetic grass is rolled tight during shipping, and it needs time to lay flat and release stored tension. Skipping this step means wrinkles and bunching later.
Pay attention to blade direction. All sections should face the same way – typically toward the main viewing area. Light reflects differently off grass blades depending on direction, and mismatched sections are obvious.
For larger installations, get help. Fake grass rolls are heavy (think 50-80 pounds for a 15-foot section). Trying to wrestle them yourself leads to frustration and back pain.
Step 8: Cut, Trim and Join Seams
Cutting to Fit
Use a sharp utility knife for all cuts. Dull blades tear and fray the backing. Cut from the back side, following the stitch rows between turf sections. Never cut through the face – you’ll create obvious bare lines.
Cut slightly oversized initially, then trim to exact fit. It’s easy to take material off; adding it back is impossible. For curves and obstacles (trees, posts, sprinkler heads), make relief cuts and work slowly. Measure twice, cut once – the old carpenter’s advice applies completely to installing artificial grass.
Leave a ¼ to ½ inch overlap at borders where turf meets hardscape. You’ll tuck these edges during the securing phase.

Joining Seams
Seams make or break a professional-looking install. Align turf edges precisely – no gaps, no overlap. Match stitch rows and blade direction carefully. Even slight misalignment creates visible lines.
Place seaming tape (the tape with the red center line) underneath, centered on the seam. Apply turf adhesive in an S-pattern across the tape. Don’t overdo it – too much adhesive squeezes up through the backing and makes a mess.
Press both turf edges firmly onto the tape. Walk the seam, applying pressure. Let the adhesive cure completely before moving to the next step – usually 20-30 minutes depending on temperature. Working with uncured seams pulls edges apart.
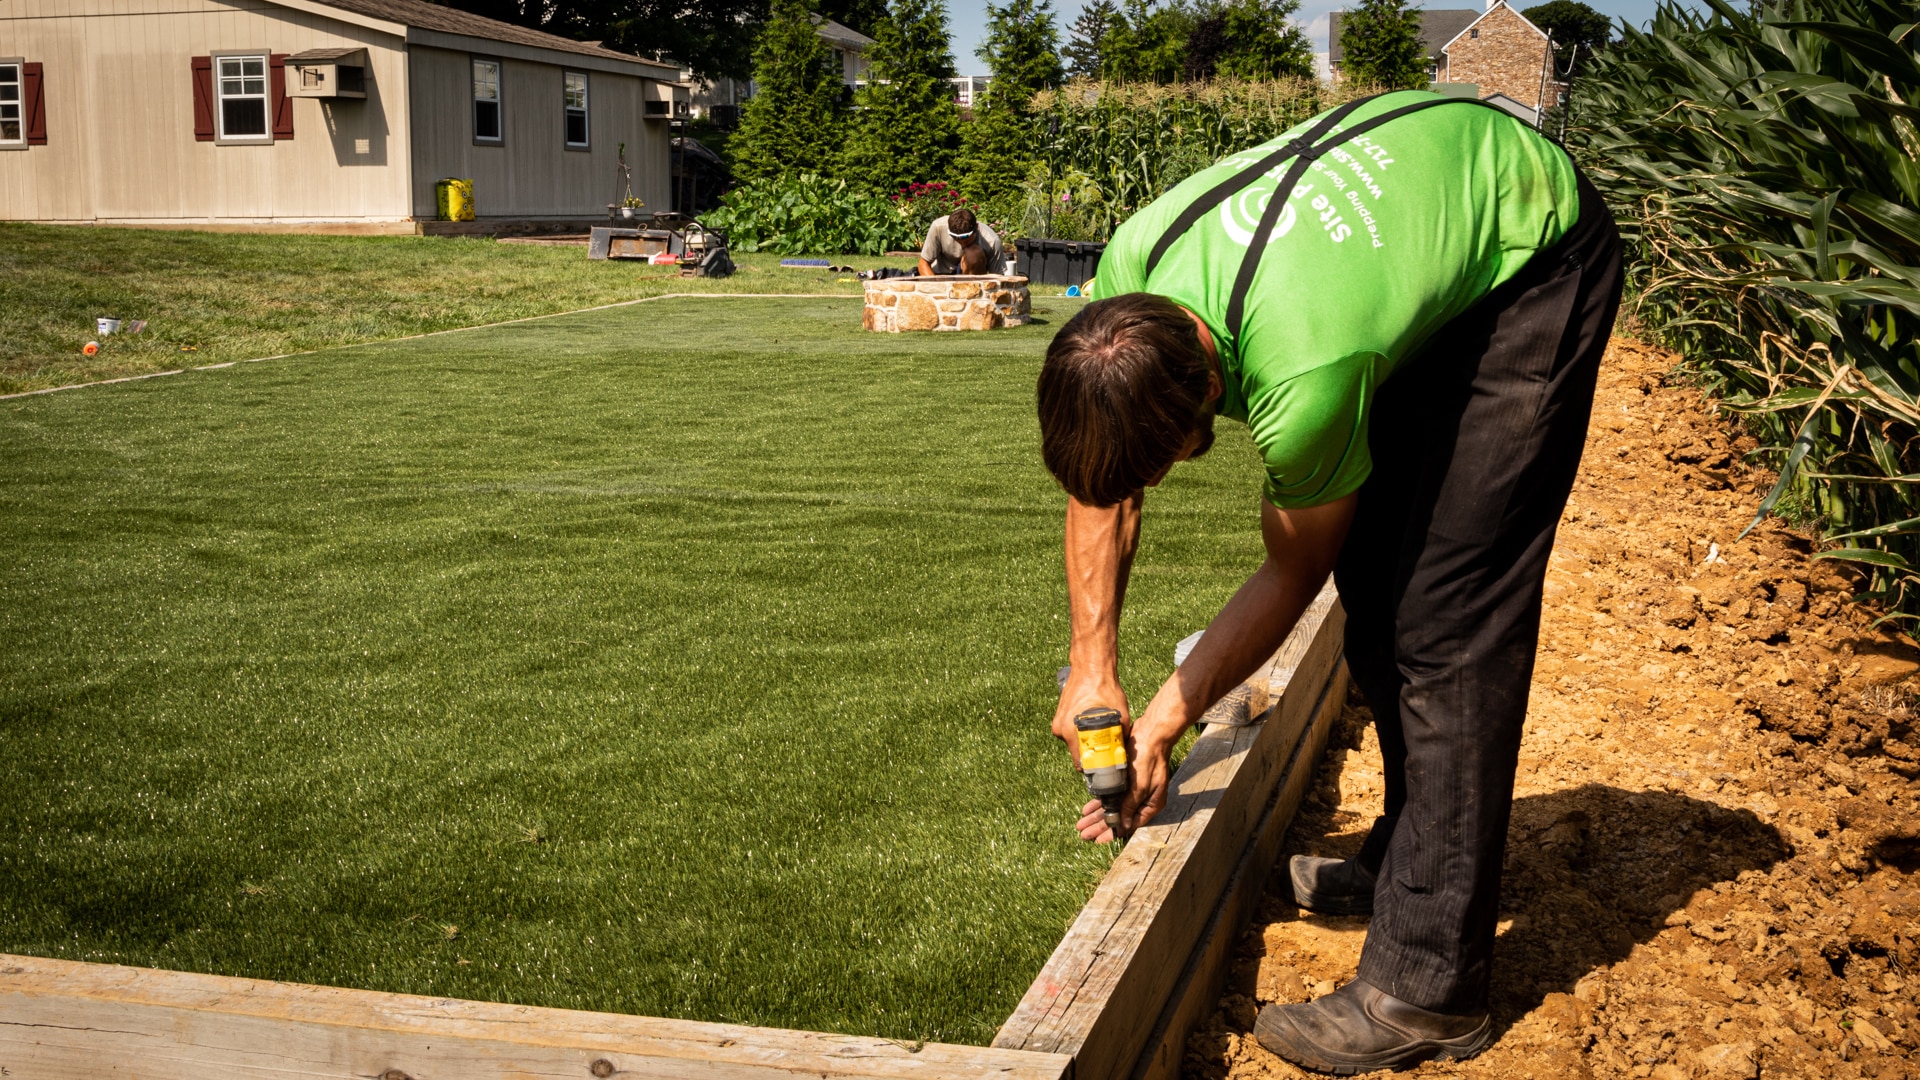
Step 9: Secure Turf with Nails and Finish Edges

Drive 5-inch turf nails (40D galvanized) around the entire perimeter, spacing them every 6 inches. Nail through the turf backing into the base below. Set nails just below the grass surface – they should be secure but not visible.
Add extra nails along seams for reinforcement. High-traffic areas benefit from closer nail spacing – go 4 inches instead of 6. Don’t skimp here. Inadequate nailing causes turf to shift, bunch, or pull away from edges.
For borders against concrete, pavers, or other hardscape, tuck the turf edge using a putty knife and hammer. Work the backing edge down into the gap between turf and hardscape, creating a clean, finished line.
Installing optional perimeter edging (plastic bender board, metal edging) creates a professional finish and helps secure edges long-term. If you’re installing artificial grass on concrete as well, check out our specialized guide on how to Install Artificial Grass on Concrete.
Step 10: Apply Infill and Final Grooming

Spreading Infill
Infill serves multiple purposes: adds weight to prevent shifting, helps blades stand upright, improves durability, and (for some materials) reduces heat. Common options include silica sand (cheapest, most popular), crumb rubber (soft, good cushioning), and zeolite (antimicrobial, great for pet areas).
Use a drop spreader for even distribution. Spread infill across the entire surface, working in multiple directions. Recommended amounts vary by turf type – typically 1-3 pounds per square foot. Check your artificial grass manufacturer’s specifications.
Add extra infill around perimeter edges for additional weight and security. Work the infill down into the turf by brushing – don’t just leave it sitting on top.
Brushing and Finishing
Power broom the turf against the grain – brush opposite to the blade lay direction. This stands blades up and works infill down between them. Cross-brush in multiple directions for thorough fluffing.
Give everything a light rinse with a garden hose. This settles infill, removes dust from cutting and installation, and reveals any areas needing touch-up.
Walk the entire area. Look for missed nails, visible seams, uneven spots. Make corrections now. Once you declare the project complete and put tools away, motivation to fix small issues disappears.
Installation Tips for Best Results
- Work in moderate weather – extreme heat makes turf hard to handle; cold makes adhesive slow to cure
- Have helpers for areas over 200 square feet – diy turf installation goes much faster with an extra set of hands
- Use a carpet kicker to stretch turf taut before nailing – eliminates wrinkles and creates professional results
- Don’t rush base prep – spending extra time on compaction and leveling saves headaches later
- Allow adequate cure time for seam adhesive – working too fast compromises seam strength
Common Installation Mistakes to Avoid
Can you just lay artificial turf on dirt? Technically yes – but it’s the number one mistake DIYers make. Turf installed directly on soil settles unevenly, develops wrinkles, has poor drainage, and generally looks terrible within months. The base layer isn’t optional.
Inadequate compaction ranks second. A loosely compacted base shifts under foot traffic, creating dips and waves. Use proper equipment and make multiple passes.
Other common errors:
- Poor drainage planning – flat areas pool water
- Mismatched blade direction between sections – obvious visual lines
- Insufficient nailing around perimeter – turf shifts and pulls loose
- Using wrong infill type – crumb rubber in pet areas traps odors; insufficient sand in high-traffic zones
DIY vs. Professional Installation: What to Consider
Installing artificial grass yourself saves money – typically 50-60% compared to professional installation. But it requires skill, proper tools, and time. Most DIY installations take 1-3 days depending on area size and complexity.
Factor in equipment rental costs: plate compactor ($75-100/day), sod cutter if needed ($100-150/day), carpet kicker ($20-40/day). Materials cost roughly the same whether DIY or professional – around $5-12 per square foot for decent quality synthetic grass plus base materials.
Professional installation typically runs $15-25 per square foot all-in. You’re paying for experience, proper equipment, warranty, and peace of mind. Curious about total costs? Our detailed breakdown on How Much Does Artificial Grass Cost covers materials, installation, and maintenance expenses.
When to hire pros: complex grading issues, areas over 1000 square feet, tight deadlines, or if you just don’t want to spend your weekend digging holes in your yard. There’s no shame in recognizing when a project is beyond comfortable DIY scope.
How to Maintain Artificial Turf After Installation
Proper maintenance keeps synthetic grass looking good for 10-15+ years. Regular brushing (2-4 times yearly) prevents matting and maintains blade memory. Use a power broom or stiff brush, working against the grain.
Rinse debris, leaves, and pet waste promptly. A garden hose works fine for routine cleaning. For stubborn stains, use mild soap and water – avoid harsh chemicals that damage turf backing.
Replenish infill as needed. High-traffic areas lose infill over time, causing blades to lay flat. Add new infill and brush it in to restore proper blade support.
For complete maintenance protocols, including dealing with pet waste, check our guide on How to Clean Artificial Grass. It covers seasonal care, stain removal, and keeping fake grass fresh year-round.
Installing artificial turf on dirt is absolutely achievable as a DIY project. Just respect the process. Every step – from measuring to final brushing – matters. Skip steps or rush through, and the finished product shows it. But follow proper procedures, take your time with prep work, and pay attention to detail? You’ll end up with a backyard that looks professionally installed.
The hardest part isn’t the technical difficulty – it’s committing the time and physical effort. Base preparation alone can eat up most of a day. But that work pays off in a stable, long-lasting lawn replacement that looks good year after year.
Need professional help with your artificial turf installation? Site Prep LLC specializes in complete outdoor landscape transformations – from excavation and base prep to final turf installation and finishing. We handle residential projects of all sizes and make the process easy. Get yourself a beautiful, maintenance-free lawn without the weekend-long DIY struggle.
FAQ About Installing Artificial Turf on Dirt
You can, but you shouldn’t. Direct installation on soil leads to settling, poor drainage, weed growth, and shortened turf lifespan. The base layer (2-4 inches of compacted aggregate) provides stability, drainage, and proper support. Skipping it is a false economy – you’ll spend more fixing problems than you saved skipping proper prep.
With proper installation (including base layer), quality synthetic grass lasts 10-15 years – sometimes longer in residential applications with moderate use. Lifespan depends on material quality, UV stabilization, infill type, traffic levels, and maintenance. Cheap turf or improper installation shortens life to 5-7 years or less.
The standard sub-base consists of: weed barrier fabric (optional, especially if you have pets), 2-4 inches of Class II road base or crushed stone, thoroughly compacted. Some installations add gopher wire for rodent prevention. This layered approach provides drainage, stability, and prevents vegetation from pushing through.
Class II road base (crushed miscellaneous base) is most popular – it compacts well, drains efficiently, and costs less than specialized materials. Crushed stone (¾ inch minus) works well in high-drainage areas. Decomposed granite is excellent for warm, dry climates. All three perform well when properly compacted – choose based on local availability and climate.
Absolutely. DIY synthetic turf installation is doable for homeowners with basic landscaping skills and proper tools. Expect to invest 1-3 days for an average backyard. The process is physical (excavation, compaction) but not technically complex. Biggest challenges are heavy lifting, achieving proper base compaction, and creating invisible seams. Following proper procedures and taking time produces professional-looking results.
Ground prep involves: removing existing vegetation and debris, excavating 3-4 inches below desired grade, creating 1-2% drainage slope, laying weed barrier (optional), spreading 2-4 inch base layer of crushed aggregate, and compacting thoroughly with plate compactor. Proper prep takes the bulk of installation time but determines final results. Rush it, and you’ll regret it.
Moderate difficulty. The actual process is straightforward – it’s basically careful landscaping – but it’s physically demanding (digging, moving materials, compacting) and requires attention to detail. Most challenging aspects are achieving level base compaction, cutting and fitting turf precisely, and creating seamless joins. If you’ve tackled landscaping projects before, you can definitely handle putting down fake grass yourself.
Modern artificial turf is safe for both pets and kids. Quality products use non-toxic materials and proper drainage prevents bacteria buildup. Choose antimicrobial infill (zeolite or coated sand) for pet areas. The turf stays cooler than concrete or asphalt, though it does heat up in direct sun. For pet-specific considerations and ongoing care, see our guide How Much Does it Cost to Install Pet Turf.