Is Artificial Turf Flammable?

Is Artificial Turf Flammable

Synthetic grass is not fire-resistant. It’s made of plastic, which means that when something like a hot ember or a burning cigarette falls on it, there is normally nothing to worry about besides a little melting in one particular spot. This is just a brief introduction. Further down, we’ll discuss why this happens, talk about the actual fire safety ratings of artificial grass and other important things.

Is Artificial Turf Flammable?

We receive that question every single week. Is artificial grass flammable? Is astro turf flammable? Or is astroturf flammable – that’s the exact same question just with a different spelling? Is turf flammable even? Well, here’s the truth. Synthetic grass doesn’t burn like natural dry grass does. Typically it’s made up of polyethylene, polypropylene, or nylon. These materials won’t burn until after they melt. Turf exposed to extreme temperatures will shrink and curl. And the fibers turn into hard little balls. It’s possible to get it to scorch if a flame was to touch it – but it’ll put itself out.

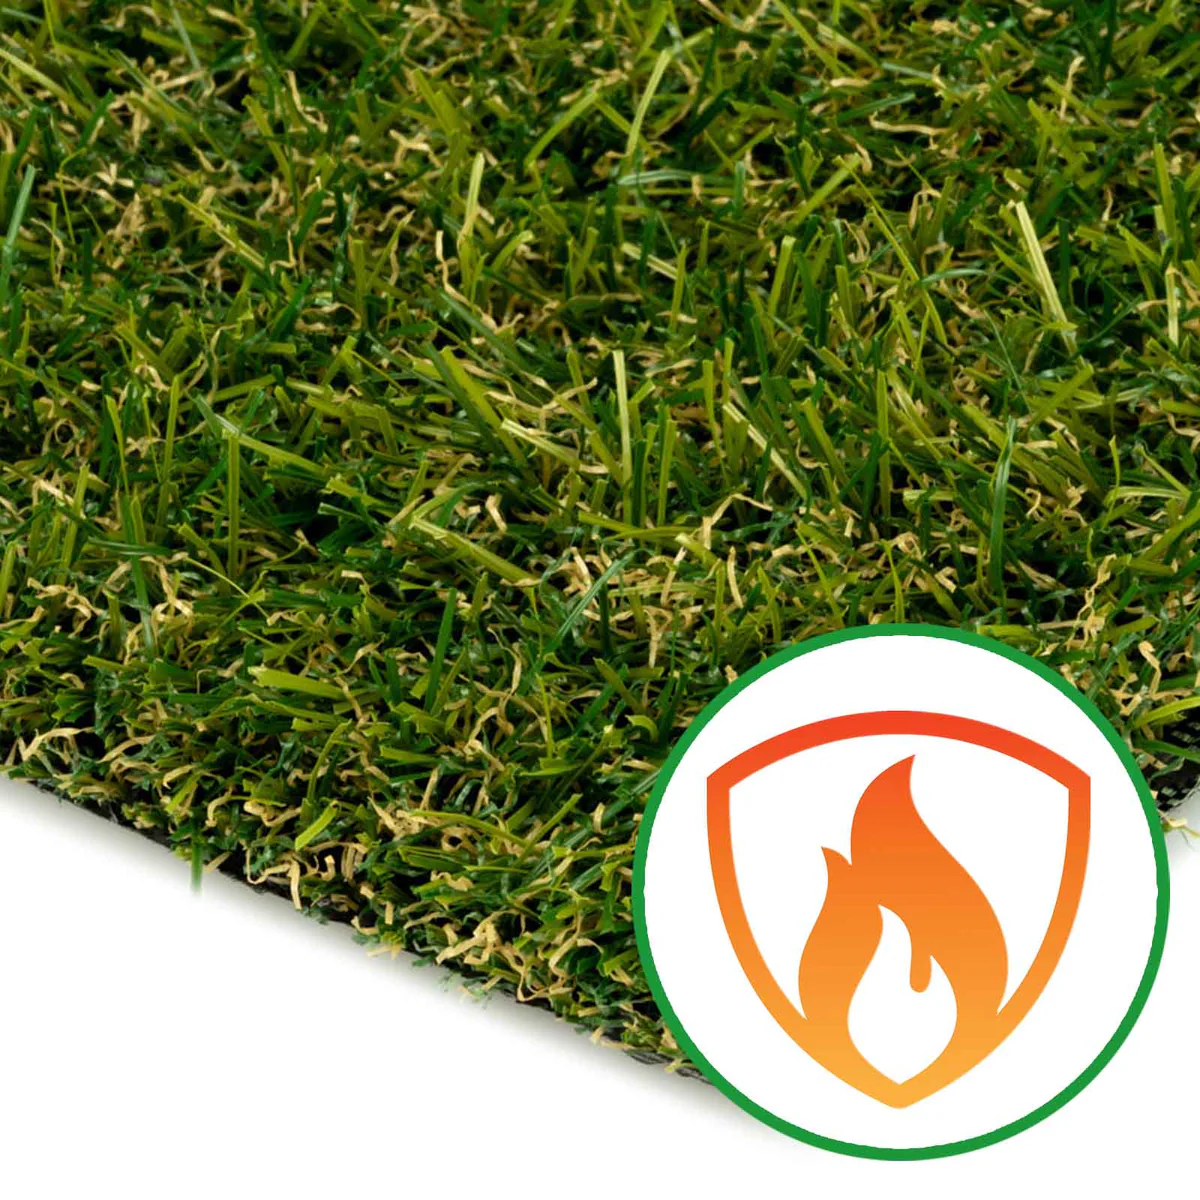
Is Artificial Turf Fire-Resistant or Fireproof?

fire resistant artificial grass

They’re often used interchangeably. But they aren’t the same at all.

  • Fireproof – doesn’t burn or melt in any case. No synthetic lawn has this quality.
  • Fire-resistant – doesn’t catch fire easily and retards flames from spreading.
  • Flame retardant – made or processed in a way to self-extinguish rather than fuel the fire.

So, if a company offers fire resistant artificial grass, you should be pleased. However, don’t misunderstand it. The fire-resistant lawn isn’t immune to a flame but will resist ignition. Moreover, fire-resistant turf can never stand being placed directly in front of a flame because of melting under the heat. We discuss fiber types among other things in our types of artificial grass article.

How to Check Artificial Turf Fire Ratings Before Installation

Here’s one key question to ask before any material enters your property: is this material rated for fire resistance, and do you have the certificate to prove it? An honest team – like the Site Prep team – will provide you with a lab certification without hesitation. Important to note:

  • The type of fiber used
  • And whether it has passed the specified standards (we’ll discuss them soon)
  • The material’s compliance with your area’s building regulations

In most cases, the absence of certification means that no testing took place. Not to mention that the base layer underneath your turf is just as important – read more about it in our installation guide.

Artificial Turf Fire Ratings and Safety Standards

Here’s where the real proof lives. A few names you’ll run into:

  • ASTM E108 – measures flame spread; a Class A rating is the top tier, and the one you want.
  • ASTM D2859 / CPSC FF 1-70 – the federal flammability “pill test” for surface materials.
  • CAL 117 (California) and EN 13501-1 (Europe) – regional benchmarks.

When a product is labeled artificial grass fire retardant, one of these tests is usually behind the claim. Live somewhere that takes wildfire seriously? Lean Class A. Curious how these products hold up over the years too? Our guide on how long artificial grass lasts breaks it down.

Fire-Rated Artificial Turf: What to Look For Before Buying

Shopping smart beats hoping for the best. Look for:

  • A clear Class A or fire-resistant rating, backed by a test document.
  • Nylon or modified polyethylene fibers – they handle heat better.
  • An installer who won’t dodge your questions.

Planning a backyard turf project? Bring up fire safety on day one – not after the fire pit’s already in place.

Frequently Asked Questions (FAQ)

Carefully. We map out mature trees, beds, and irrigation before excavation, then dig with their root zones in mind and protect what stays. The aim is a new patio without sacrificing your established yard.

Often, yes, with the right prep. Fill and disturbed soil need extra compaction and sometimes deeper base work so the slab won’t settle. We test the ground first, then build the foundation to match it.

Good idea. We can tie gutters and downspouts into the patio’s drainage installation so roof water runs off cleanly instead of pooling. Handling it during the build keeps your slab and foundation dry for years.

Sometimes. Heavy rock, ledge, or steep grading takes more time and equipment, which can raise the price. We assess the ground up front, so your quote reflects your actual site, with no surprise fees later.

We do. As an excavation company first, we run our own digging, grading, and base work instead of handing it off. That control over site preparation is what makes our concrete patios sit level and last.

Absolutely. We clear brush, pull stumps, and haul debris as part of site preparation, so you start with a clean, gradeable lot. A messy or wooded yard is just the first step we handle before we pour.

Yes, we dig right in. New York ground often hides rock and ledge, so we bring the right excavation gear, break or work around it, then build a level compacted gravel base on top. Tough ground doesn’t stop us.

Yes. If you want shade later, we pour footings and a slab ready for a pergola, awning, or cover. Planning it during installation means solid anchor points and no drilling into a finished patio later.

We can. We stage the work to keep entries open, protect access, and clean up daily, so people come and go fine. We just need the patio area itself clear during pouring and curing.

Absolutely. For rentals, we pour a low-maintenance slab that tenants can’t easily damage and you won’t fuss over. A sealed, reinforced patio means fewer repair calls and a cleaner-looking property.

Yes, and it matters in the city. A fully paved yard can push water at the house, so we set patio grading and drainage installation to steer runoff to the street, away from your basement and foundation.

Built to. A properly poured slab over a solid base shrugs off grills, tables, and a yard full of guests. Reinforced concrete plus quality concrete finishing means it won’t crack or wear under heavy use.

Definitely. We design custom concrete patios for two- and three-family homes, using durable reinforced concrete that handles shared use. We can even zone the space so each unit gets its own usable area.

Sure. Plenty of Newark yards work best as one clean concrete surface. We grade the whole area, lay a compacted gravel base, and pour a single slab with expansion joints so it stays solid and drains right.

We do. Our professional concrete patio installation comes with a workmanship warranty, on top of the durability of a proper base, reinforced concrete, and careful curing. Just ask us for the full details.

Carefully. We locate septic fields, lines, and buried utilities first, then design around them so nothing gets damaged or paved over. Building right over a septic field is a no – we route clear of it.

Yes. New Jersey permitting is strict and town-specific, so we handle the applications and inspections for you. You get a patio that’s fully compliant without chasing paperwork around the municipal office.

They can over time. We plan the layout around big trees, add reinforced concrete and expansion joints, and sometimes a root barrier, so growing roots don’t lift or crack the slab down the road.

Usually, yes. Soggy lots just need more groundwork – extra fill, a deeper compacted gravel base, and proper drainage so the slab stays dry and stable. We assess the wet spots before we pour a thing.

With drainage built in from the start. We set patio grading to pitch water off the slab and add drainage installation, sometimes a French drain, so big storms run off toward the street, not your foundation.

It can. Many New Jersey towns cap how much of your lot can be hard surface. We check local coverage limits during planning and, when needed, suggest concrete paver patios or permeable options to stay compliant.

Usually not, when it’s built right. A properly poured slab with reinforced concrete and good expansion joints carries snow load fine. Just keep piles even so one side doesn’t trap meltwater by the house.

Air-entrained reinforced concrete built for the cold. Those tiny air pockets give freezing water room to expand without cracking the slab. It’s a small mix change that makes a huge winter difference.

Smart move. A brand-new slab needs a full cure first, but an existing patio benefits from surface sealing in early fall. That seal blocks water before it can freeze, expand, and crack the concrete.

Flaking, called spalling, comes from freeze-thaw and salt working into the surface. We can grind and apply patio resurfacing if the slab is sound, or recommend replacement when the damage runs deep.

Not if you’re sensible. A plastic shovel or a snowblower set to the right shoe height is fine on a cured, sealed slab. Avoid dragging metal edges hard, and the concrete finishing stays smooth for years.

Skip rock salt – it eats concrete. We suggest calcium magnesium acetate or plain sand for traction instead. A gentler de-icer plus regular surface sealing keeps your patio from pitting over the winters.

Below the frost line, which runs around 42 inches in much of Michigan. We dig deep, lay a thick compacted gravel base, and add drainage installation so meltwater can’t freeze under the slab and heave it.

Often, yes, though city setbacks and shared walls can limit how close it runs. We check the rules and your lot lines first, then design the patio to fit legally and drain properly within them.

We do. Our licensed demolition crew breaks out the old pad, loads the debris, and hauls it off, then preps a fresh compacted gravel base. You’re left with a clean site, not a pile of rubble.

Yes. While we’re set up, we can pour a walkway, parking pad, or steps in matching reinforced concrete. Doing it in one visit keeps the finish consistent and saves you a second mobilization fee.

It can. We match stamped concrete patios in Baltimore to brick, bluestone, or historic stone so the patio looks like it belongs. The finish, color, and border all get tuned to your home’s character.

Carefully. Dense lots leave water nowhere to go, so we plan patio grading and drainage installation to steer runoff toward the alley or street, away from your foundation and your neighbors’ walls.

We’re used to it. When there’s only alley or walk-through access, we bring smaller equipment, mix on site, and hand-haul materials. Tight access slows us a little, but it never stops the job.

Absolutely. Compact city yards are our specialty. We design custom concrete patios that use every square foot, with clean lines and the right grading so even a tiny rowhouse backyard feels usable.

Most stains lift with warm soapy water and a stiff brush, or a degreaser for oil. Staying on top of spills and keeping up with surface sealing every few years makes cleanup easy and the patio look fresh.

We can rough it in. For a heated patio, we install the radiant tubing or cable before the concrete pouring, then connect it to your system. Planning it during the build is far cheaper than retrofitting later.

It depends on the finish. A smooth slab gets slick when wet, so for safety we usually suggest a broom finish or exposed aggregate, which grip well even in rain or light ice. Concrete finishing matters here.

Often we help with that. Many Ohio neighborhoods have HOA rules on size, finish, and setbacks. We design the patio to fit those guidelines and can supply the details your association needs to approve it.

We can. We design custom concrete patios that meet a walkout basement or lower level cleanly, matching the height and grading so water drains away from the door instead of pooling against it.

Yes. Hot tubs are heavy, so we pour a thicker, reinforced concrete pad over a deep compacted gravel base to carry the load. Tell us up front and we’ll size the slab and footings to hold it safely.

Easily. With a fire pit, a little cover, or a heater, a concrete patio works from the first warm spring day through fall. The slab itself shrugs off the cold, so the space is ready whenever you are.

Not much, honestly. Clear furniture and planters from the area, unlock gate access, and flag any sprinkler lines you know of. We handle the rest, from layout to concrete pouring to final cleanup.

Less than you’d think. We stage materials neatly, protect what we can, and clean up daily. There’s some digging during site preparation, but our crew keeps the footprint tight and the mess minimal.

Definitely. We design custom concrete patios that connect cleanly to decks, porches, walkways, and pool surrounds. Matching the height, finish, and drainage up front keeps the whole space flowing.

Plenty. Stamped concrete patios in Maryland can mimic stone, brick, slate, or wood in grays, earth tones, and warm browns. Integral color, stains, and borders let you match your home’s exact look.

We do. Our concrete patio contractors work across the area, from the hills near Frederick and Hagerstown to Annapolis and the Bay. We adjust the build for local soil, slope, and weather every time.

Yes. Slopes are common here, and we handle them with proper patio grading, retaining edges, and smart drainage installation. A little leveling up front gives you a flat, usable patio that drains right.

Maryland’s heavy clay swells and shrinks with moisture, which can move a poorly built slab. We stay ahead of it with deep site preparation, a compacted gravel base, and reinforced concrete that holds firm.

Yes. We start with a free on-site estimate, where we look at your yard, soil, and grade, talk through design options, and give you a clear price. No obligation, just a clear number for your patio.

We work to avoid it. We plan the access route, lay protection over lawns and driveways, and use the right-sized equipment for your yard. Any unavoidable disturbance gets repaired before we finish.

It depends on the season. Spring and summer book up fast, so a few weeks of lead time is wise. Reach out early and we’ll schedule the site visit, permitting, and pour around your timeline.

Often a great move. We remove the old deck, handle the site preparation, and pour a concrete patio in its place. A slab needs far less upkeep than wood and won’t rot or warp.

With drainage and grading built in. On a slope, we direct runoff with proper patio grading and drainage installation, plus edging where needed, so water moves around the patio, not under it.

We can. A retaining wall holds back the slope and creates a flat pad for the patio above or below it. We design the wall, drainage, and compacted gravel base together so it stays stable for years.

Yes. Pennsylvania’s hilly lots are ideal for tiered patios. We use retaining edges, patio grading, and a stepped layout to turn a steep backyard into level, usable space.

Permit rules vary by locality, patio type, size, utilities, and site conditions. Check your local building department before work starts, especially for structural changes.

Yes. Old patios can be removed and replaced when they are cracked, sinking, poorly drained, or outdated. Replacement allows better layout, grading, and finish.

Stamped concrete patios can crack, like any concrete. Proper grading, base compaction, reinforcement, expansion joints, and curing help reduce random cracking.

A well-installed concrete patio can last for decades when the base, drainage, joints, curing, and sealing are done correctly. Poor prep can shorten its life quickly.

A broom finish is practical and slip-resistant. Stamped concrete is more decorative. The best option depends on budget, style, foot traffic, and maintenance needs.

Many patio installation projects take a few days, plus curing time. Larger patios, old concrete removal, drainage work, or decorative finishes can extend the schedule.

Concrete patio cost depends on size, access, grading, finish, demolition, drainage, and reinforcement. A simple slab costs less than stamped concrete or complex site work.

Ours spells out site preparation, base, reinforced concrete, finishing, expansion joints, curing, and surface sealing – no vague line items. Contact us and we’ll price your exact patio, not a guess.

Often, yes. A clean, well-built patio reads as finished outdoor living space, and stamped or custom finishes add curb appeal. Buyers notice quality work that won’t need fixing for years.

With a poured slab, weeds have nowhere to root, since expansion joints are sealed rather than open. For concrete paver patios, polymeric sand in the joints plus an occasional rinse keeps them clear.

Absolutely. We design custom concrete patios with built-in features like fire pits, seating walls, planters, and steps. Planning them up front means cleaner lines and no awkward retrofits later.

It depends on how you’ll use it. A bistro spot can be 10 by 10, while a dining-and-lounge setup wants 16 by 18 or bigger. We help you size it for furniture, foot traffic, and future add-ons.

Coastal salt can pit unprotected concrete over time. We counter that with reinforced concrete and regular surface sealing, which shields the slab from salt, moisture, and the freeze cycles that follow.

It really does. Sandy or high-water-table lots need extra base work and a deeper compacted gravel base so the slab won’t settle. We test the ground first, then build the foundation to match it.

It’s easy. Rinse off debris, wipe spills early, and reseal every two to three years. That surface sealing habit fights stains, moisture, and the road-salt damage so common in Connecticut winters.

Sometimes, yes. If the base is sound, a bonded overlay or patio resurfacing works great. If it’s cracked or heaving, replacement is smarter, and our licensed demolition crew clears the old slab first.

You can usually walk on it after 24 to 48 hours. Hold off on furniture for about a week. Full strength comes near 28 days, so we time surface sealing for once the slab has properly cured.

Most backyard patios need at least four inches of reinforced concrete over a compacted gravel base. We pour thicker for heavy loads like hot tubs or outdoor kitchens. Thickness drives durability.

Each has its place. A poured slab is the most low-maintenance and budget-friendly long term, pavers are easy to repair, and decks demand the most upkeep. We’ll walk you through the trade-offs honestly.

A little hairline cracking is normal anywhere, but it stays minor with reinforced concrete, well-placed expansion joints, and solid drainage. Built right, a slab handles New England freeze-thaw for decades.

Late spring through early fall is the sweet spot. Mild, dry days let concrete curing happen evenly. We can still pour in cooler months, using blankets and admixtures to shield the slab from frost.

Often yes, especially for larger builds or work near setbacks. We help you sort permits during planning, so your project stays compliant and stress-free.

Absolutely. We handle patio replacement in Reading start to finish – licensed demolition, hauling, a fresh base, and a new slab built to last for decades.

All concrete can crack over time, but expansion joints and reinforced concrete keep it controlled. Solid site preparation and proper curing make a huge difference.

A properly installed concrete patio lasts 25 to 30 years, often longer. Good drainage, expansion joints, and surface sealing all stretch its lifespan considerably.

It depends on your goal. Broom finishes give grip, stamped concrete adds style, and exposed aggregate brings texture. Our concrete patio installers help you pick.

A typical patio installation takes 3 to 7 days, including prep, pouring, and curing. Weather and slab size can stretch that. Curing simply needs time you can’t rush.

Most concrete patios in Reading run $8 to $20 per square foot. Stamped or decorative finishes cost more. Size, design, and site prep all shape your final price.

Sometimes – it comes down to size, placement, and whether it ties into other structures. We check local requirements before we start, so nobody gets a surprise letter from the township.

Absolutely. We handle full patio replacement when the base is shot, and patio resurfacing when the slab underneath is still sound and just looks tired – we’ll look and tell you which fits.

All concrete can crack eventually – it’s rigid, and it reacts to freeze, thaw, and settling. But expansion joints, a solid base, and reinforcement steer those cracks to where they won’t bother you.

With proper concrete curing and a regular surface sealing schedule, 25-40 years is normal, and plenty of slabs outlast that. The base does the heavy lifting – a compacted, well-drained one keeps the patio from shifting.

Depends what you’re after – a broom finish gives grip and value and never looks dated, while stamped concrete wins on looks, faking stone or brick for less. We’ll walk you through samples before anything gets poured.

The build itself usually runs 2-5 days, depending on square footage and weather. Then concrete needs curing time, so we’ll tell you when it’s ready for foot traffic versus heavy furniture.

Most land between $8 and $20 per square foot, depending on size, finish, and how much prep the site needs – plain slabs sit low, while stamped and custom builds climb higher. We quote the real number once we’ve seen the space, not before.

Sometimes, depending on size and placement. We’ll check the local rules for you before we start.

Yep – we handle full patio replacement and patio resurfacing both.

All concrete can crack eventually. Expansion joints and a solid base keep it to a minimum.

With proper curing and surface sealing, 25-40 years is normal.

Broom finish for grip and value, stamped for looks. It really comes down to your priorities.

Usually 2-5 days for the build, plus curing time before you load it up with furniture.

Most land between $8 and $20 per square foot, depending on size, finish, and prep work. Stamped and custom builds sit at the higher end.

Avoid attempting to mend the melt area directly. Instead, remove the affected area entirely and replace it with a piece that will blend seamlessly with your current turf. Wondering about the level of damage? Have Site Prep assess and install your new turf.

Yes, for the most part – and frequently safer even than dead natural grass, which burns quickly. In areas prone to wildfires, in fact, a Class A lawn atop an incombustible surface serves as a protective barrier. This is one of the key reasons homeowners living in hotter climes choose it.

  • Keep grills, fire pits, and smoke areas off of grass and on the hardscaped areas.
  • Install a non-flammable edge around any area with heating sources.
  • Buy fire-resistant material in the first place.
  • See melted spots? Either move reflective items or block the window that causes it.

The damaged blades fuse into a hard, discolored patch that won’t bounce back. It doesn’t usually spread – but it won’t self-heal either. The fix is replacing that section, not repairing the melt.

Of course, heat is the major threat – embers, sparks, lit cigarettes, and reflective surfaces. However, there are other dangers to be aware of like rough surfaces, strong chemicals, and pet waste allowed to sit. In all honesty, proper maintenance of fake grass – cleaning, brushing, and keeping it away from heat – stops problems from arising.

Is it normal sunlight? Not at all. However, reflected sunlight does the dirty deed for the low-E, energy-efficient windows that are able to concentrate sunlight and burn a swath right into your grass. The dark grass will be very hot to the touch during an extreme day.

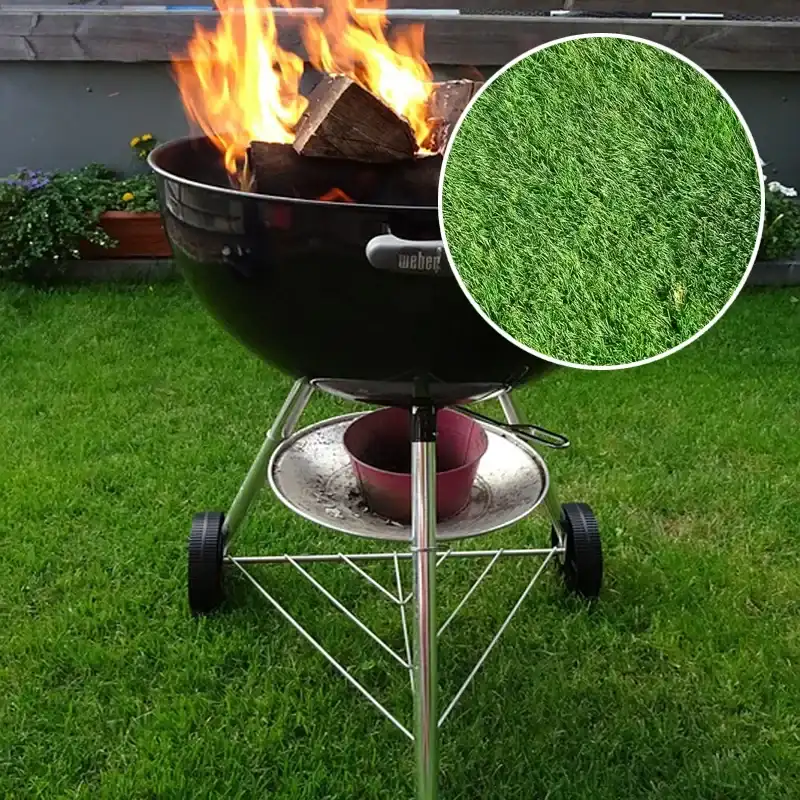
No, not possible. There will be burning particles that will fall to the ground. Since artificial grass melts with heat, this should be prevented from happening by placing your fire pit over a layer of paving stones, concrete, or gravel.

Most homeowners need to perform only a deep cleaning once a year or every six months – the rest will be taken care of by you. It should be mentioned that a well-maintained lawn helps maintain the value of the property. You may find out about whether artificial turf adds value to homes. And if you’re weighing a fresh install or replacing tired turf, our synthetic grass installation team can help.

Not really, assuming that a weed barrier has been used during installation of artificial grass. However, the edges of the area can become infested due to seed scattering.

Frequent rinsing, immediate disposal of any solid waste, and elimination of bad odor using enzyme cleaners or vinegar will help keep your pet zones clean.

Yes, but not too much. The maintenance of artificial turf involves only periodic rinsing, brushing, and removal of debris – way less than what a natural lawn would require.

It might do some damage if used incorrectly. The pressure washer should be kept to its lowest level or fan mode, and the wand kept several feet away from the surface.

In many situations, gravel is a better long-term foundation material than sand. A properly compacted gravel base provides superior drainage, improved stability, and reduced risk of erosion or washout.

Benefits of a gravel pool base include:

  • Better drainage performance
  • Greater resistance to settling
  • Improved structural support
  • Lower long-term maintenance requirements

Many homeowners combine a gravel foundation with a pool pad to achieve both stability and liner protection.

Sand is one option for creating a smooth surface beneath an above-ground pool, but it is not always necessary. Many modern pool installations use compacted gravel foundations with a pool pad instead of a thick layer of sand.

While sand can help cushion the liner, it may shift over time and require more maintenance than other foundation systems. The best choice depends on the pool type, site conditions, and your preferred foundation design.

No, it is not recommended to install an above-ground pool directly on grass. Grass and organic material decompose over time, which can create uneven settling beneath the pool and affect its stability.

Before installation, remove all grass, roots, and organic matter, then build a level base using an approved pool foundation material such as crushed stone, sand, or a professionally constructed gravel pad.

The best material to put under an above-ground pool depends on your budget, soil conditions, and the type of pool you’re installing. For most permanent above-ground pools, a compacted gravel foundation combined with a pool pad offers the best balance of stability, drainage, durability, and long-term performance.

Other common pool base materials include:

  • Crushed stone
  • Mason sand
  • Concrete pads
  • Foam pool pads
  • Geotextile liner pads

A properly prepared and level foundation is more important than the specific material you choose.

A gravel shed foundation is often a better choice than concrete for many residential sheds because it provides superior drainage, lower installation costs, and easier site preparation. Gravel foundations also reduce the risk of standing water collecting beneath the shed.

Concrete may be a better option for certain situations, including:

  • Very large buildings
  • Garages and workshops
  • Structures with heavy equipment
  • Areas with specific code requirements

For most backyard sheds, however, a properly installed gravel shed foundation offers an excellent balance of durability, drainage, and cost-effectiveness.

In many areas, shed anchors are recommended or required by local building codes. Anchoring helps protect the structure from strong winds, uplift forces, and seasonal ground movement.

The best anchoring method depends on several factors, including shed size, local wind exposure, and foundation type. Common options include ground anchors, auger anchors, concrete anchors, and engineered tie-down systems.

Yes, a gravel shed foundation can be built on a sloped site, but additional preparation is usually required. Depending on the grade, the foundation may need retaining walls, pressure-treated timber borders, deadman anchors, or other reinforcement methods to keep the gravel contained.

Building on a slope requires careful planning to ensure the shed remains level and properly supported. In many cases, a professionally designed gravel foundation is the most effective solution for uneven terrain.

A gravel shed foundation should typically be 4 to 6 inches deep after compaction. This depth provides adequate drainage and support for most residential storage sheds.

However, the ideal depth may vary depending on factors such as:

  • Shed size and weight
  • Local soil conditions
  • Climate and frost depth
  • Whether the site is level or sloped

For larger sheds, workshops, or areas with poor drainage, a deeper gravel foundation may be necessary to maintain long-term stability.

Landscape fabric, also known as geotextile fabric, is highly recommended beneath a gravel shed foundation. It helps separate the gravel from the underlying soil, improves drainage performance, and reduces weed growth.

Without a fabric barrier, soil can gradually mix with the gravel layer, reducing the effectiveness of the foundation and increasing maintenance requirements. A high-quality geotextile fabric can significantly extend the lifespan of a gravel shed base.

The amount of gravel needed depends on the shed size, foundation depth, and site conditions. Most gravel shed foundations require between 4 and 6 inches of compacted gravel, although larger sheds or sites with poor soil may require additional material.

To estimate gravel requirements, you will need:

  • The length and width of the gravel pad
  • The desired gravel depth
  • Whether the site is level or sloped

As a general rule, a larger gravel pad improves drainage and provides better support around the shed perimeter.

The best gravel for a shed foundation is clean, angular crushed stone. Unlike rounded gravel, crushed stone locks together during compaction and creates a stable base that resists shifting and settling.

Recommended options include:

  • 3/4-inch clean crushed stone (#57 stone)
  • 3/4-inch minus crushed gravel (where permitted)
  • Crushed limestone or crushed granite, depending on local availability

Avoid pea gravel, river rock, and decorative landscaping stone, as these materials do not compact properly and can lead to foundation movement over time.

Yes, a shed can sit directly on a properly constructed gravel foundation. In fact, a gravel shed foundation is one of the most popular and reliable base options because it provides excellent drainage, helps prevent moisture buildup, and creates a stable surface for the shed. The key is using compacted crushed stone rather than loose decorative gravel and ensuring the foundation extends beyond the shed footprint.

Crumb rubber offers more cushioning. Silica sand gives a firmer, faster surface. Many professional installations use a blend of both for balanced performance.

Yes. Site Prep LLC handles basketball court installations – from site prep and base work to turf installation.

Yes. Quality fake grass basketball court systems use infill that cushions impact – often safer than concrete. The consistent surface also reduces trip hazards compared to natural ground.

With professional installation and average upkeep, most artificial turf systems last 15-20 years. Turf quality and infill type are the biggest factors.

Yes – absolutely. Modern synthetic grass basketball courts are designed for real gameplay. The surface is firm enough for dribbling, drains quickly after rain, and handles lateral movement well. It won’t feel like hardwood, but for outdoor recreational playing, it’s excellent.

Absolutely. Whether it’s a residential demolition service in Baltimore or a commercial site teardown, our demolition experts are fully equipped for both.

Yes. We routinely use smaller machinery in constrained spaces to avoid damaging nearby structures or landscaping. Just describe the site and we’ll plan accordingly.

Small structures usually wrap in half a day to a full day. Larger jobs depend on scope and access. We give you a realistic timeline at quote time.

Yes, always. Cleanup is part of the job – not an add-on. Once the structure is down, all debris is loaded out and disposed of properly.

Full-structure demolitions typically require a permit. Smaller structures like sheds vary by jurisdiction. We’ll walk you through what’s needed before any work begins.

It depends on the structure’s size and type. A small shed teardown costs far less than full garage or slab removal. Get a free, no-obligation quote and we’ll give you a clear number upfront.

Absolutely – that’s one of the biggest advantages of working with us. After demolition, Site Prep LLC can install a gravel pad, concrete slab, artificial turf, new foundation, parking pad, fire pit area, or basically anything you need for the site. One company, one project, start to finish.

We haul it. Full cleanup is part of the job. When our crew leaves, the site is clear – not just “mostly clear.” Concrete, wood, metal, gravel – all of it goes with us. You’re not left managing a pile.

Yes. We handle both residential demolition services in Allentown and commercial demolition services for businesses and property developers. If you have an industrial or larger-scale project, reach out and we’ll discuss the scope.

Small jobs – a shed, a deck, a concrete patio – often get done in a single day. Larger structural demolitions can run two to four days depending on complexity and cleanup scope. We’ll give you a realistic timeline when we quote the job, and we stick to it.

For most small structures like sheds, gazebos, or patios – no permit is typically required. Larger jobs, particularly full house demolition or building demolition, usually do require permits from the City of Allentown. As your professional demolition contractor, we’ll walk you through what’s needed for your specific project before we start.

It depends heavily on what’s being demolished – a small shed costs a fraction of what a complete garage or house demolition runs. Factors like structure size, materials (wood vs. concrete vs. steel), debris volume, and site access all affect pricing. The best way to get an accurate number is to reach out to us for a free quote. We’ll give you a real estimate, not a vague range.

Residential demolition typically involves homes, garages, sheds, pools, and backyard structures. Commercial demolition services cover industrial buildings, larger structures, commercial lots, and projects that often require additional permitting and coordination. We handle both – but the planning and crew requirements differ between the two.

Yes. Site Prep LLC is a fully licensed and insured building demolition contractor operating in Pennsylvania. We carry the coverage required for both residential and commercial demolition services.

A small shed or garage demo is usually done in a single day. Larger projects like full house demolition or in-ground pool removal may take 2-4 days depending on scope and site conditions. We’ll give you a realistic timeline during your quote.

Yes. Partial demolition – sometimes called selective or structural demolition – is something we handle. We can take down specific sections while leaving the rest of the structure intact, as long as it’s structurally sound to do so.

Yes – always. Full debris removal and cleanup is included in every demolition job we do. We don’t leave piles on your property. The site is cleared before we pack up and leave.

For smaller structures like sheds or above-ground pools, permits aren’t always required. But for larger jobs – garages attached to the house, full home demolition, or anything involving sewer and septic – permits are typically needed. We handle the permit process as part of the project, so you don’t have to figure it out yourself.

It depends heavily on the structure size, materials, and site access. A small shed removal might run a few hundred dollars. A full garage demo or large concrete slab job will cost more. We always offer a free on-site quote so you know the exact number before any work starts.

Yes. We are a licensed, insured professional demolition contractor operating in Lancaster and throughout Pennsylvania. We’re happy to provide documentation upon request.

We handle complete demolition cleanup – all debris is loaded and hauled from your property. We sort materials for recycling where possible (concrete, metal, etc.) and dispose of the rest properly.

Absolutely. Partial or selective demolition requires extra care to protect the remaining structure. We assess structural connections carefully before starting so nothing unexpected comes down with it.

We serve Lancaster city and surrounding areas including Lititz, Ephrata, Manheim, Elizabethtown, Leola, Quarryville, Mount Joy, and most of Lancaster County. If you’re unsure whether we cover your area, just call and ask.

Yes. We work with commercial clients throughout Lancaster. Commercial demolition contractor in Lancaster projects typically involve larger footprints, more coordination, and stricter timelines – and we’re equipped to handle all of it. Call us to discuss your commercial demolition services project.

It depends on the scope. A small shed or patio can be done in a day. A full garage usually takes 1-2 days. A complete home demolition might take 3-5 days depending on size and site conditions. We’ll give you a realistic timeline during your estimate.

Most demolition projects in Lancaster – especially anything structural like a garage, house, or addition – require a permit from the city or county. Site Prep LLC handles the permitting process as part of our service, so you don’t have to figure it out yourself.

We do. Call us, describe your project, and we’ll schedule a site visit to give you an accurate quote. No vague ballpark numbers – just a real assessment.

All debris is hauled off-site and disposed of responsibly. Your property will be left in a clean, cleared condition – ready for whatever comes next.

Yes. Septic and sewer demolition and decommissioning are part of what we do. These require proper utility coordination and, often, municipal notification – we manage all of it.

Yes. We’re a fully licensed and insured demolition company. That protects both your property and our crew throughout the project.

Depends heavily on the structure. A small garage or shed can come down and be cleared in a single day. A full house demolition typically takes 2-5 days, factoring in debris removal. We’ll give you a realistic timeline during the assessment.

Yes, in most cases. Structures of significant size – houses, garages, commercial buildings – require demolition permits from the City of Philadelphia Department of Licenses and Inspections. We handle this process for you.

Yes. We work with property managers, developers, and business owners as a commercial demolition contractor in Wilmington, DE. Call us to discuss your project scope.

We haul it. All of it. Concrete, wood, metal – it goes on our trucks and gets disposed of properly. You don’t deal with any of it.

Yes. We’re a licensed and insured demolition contractor operating in Delaware and surrounding states. We carry full liability coverage and workers’ compensation on every job.

Technically, for very small structures, yes. But for anything involving concrete foundations, attached structures, or underground systems – please don’t. The risk of hitting utilities, violating code, or creating structural hazards is real. Call a professional demolition contractor and get it done right.

Depends on the scope. A small garage? Often one day. A full house demolition with cleanup can take two to four days. We give you a realistic timeline before work begins – not an optimistic guess.

Yes – in most cases. Any structural demolition, including garages and houses, requires a permit through the City of Wilmington or the county, depending on location. We handle the permitting process for you as part of our service.

We sort on-site. Concrete and masonry go to a recycling facility. Metals to a scrap yard. Wood and general waste to a licensed C&D landfill.

Technically, sometimes. Realistically? Bad idea. DIY demo means you’re personally liable for any utility strike, asbestos exposure, or worker injury. One ruptured gas line and your homeowner’s policy is gone. Hire a local demolition contractor and sleep easier.

Inside Harrisburg city limits, yes. Anything over 200 sq ft or with utilities running to it needs a demo permit. Penalties for skipping it start around $500.

One to four days for the actual teardown on a single-family home. Add another week or two for permits, utility disconnects, and cleanup.

Absolutely. Skip it and you’ll be calling someone else in two years to redo the whole thing.

Concrete is faster to build and lower maintenance. Brick (real fireproof brick, not standard) gives you the classic look but costs more in labor.

Yes, but setbacks matter. We follow DC Fire Code minimums (15 feet from structures) and often recommend more if there’s airflow or overhang concerns.

Sometimes. It depends on your neighborhood, lot size, and proximity to structures. We check before we dig – that’s part of the assessment.

Most builds take 1-3 days for a standard fire pit, longer for outdoor fireplaces or projects tied into a new patio.

Yes. Most lots located near Wheeling, Charleston, or the Eastern Panhandle face challenges due to the presence of slopes. In addition to building a fire pit, we also undertake site grading and retaining.

For most installations in northern-central and eastern WV, three to seven days would be sufficient. Large custom installations in places like Morgantown, Martinsburg, and Clarksburg could go up to two or three weeks.

Both options will work. Wood is good for rural backyard installations in towns such as Beckley and Fairmont. If you want immediate ignition during burn bans, then gas will suit you. Up to you.

Yes, when building your fire pit in West Virginia, especially when it is a permanent structure or an outdoor fireplace. Each city like Huntington, Wheeling, and Parkersburg, to name a few, has its own set of rules.

This varies per locality, although in Charleston, Morgantown, and neighboring places, a minimum of 10 feet away from any building is the norm. Of course, anything further away is even better.

Sometimes yes, sometimes no. It depends on the patio’s structural integrity and material. We’ll evaluate during the consultation.

Standard recommendation is 10 feet minimum from any structure, fence, or overhanging tree. We verify exact setbacks during the assessment.

Wood gives you that crackling, smoky atmosphere people love. Gas gives you instant on, instant off, and zero cleanup. About 60% of our clients pick wood. The rest go gas, especially those with kids or HOA restrictions.

In most Virginia jurisdictions, permanent installations require a building permit, especially anything tied into gas lines or built near a deck. We pull all required permits as part of the job.

Basic concrete fire pits start around $1,800 to $3,500. Mid-range stone builds run $4,000 to $8,000. Full outdoor fireplace structures with chimneys range from $9,000 to $20,000+. Final pricing depends on size, materials, and site conditions.

Concrete typically costs $3-8 per square foot installed, making artificial turf more expensive initially but offering superior aesthetics and comfort.

While not permanent, quality installations last decades and can be removed or replaced when desired.

Timing installation during off-seasons, handling site prep yourself, and choosing appropriate quality for your needs provides the best value.

While possible, DIY installation requires proper equipment and expertise. Mistakes often cost more to correct than professional installation would have cost initially.

For most homeowners, the combination of water savings, eliminated maintenance costs, and increased property value makes artificial turf cost-effective over time.

Quality synthetic turf typically lasts 15-25 years with proper installation and maintenance, far exceeding the lifespan of natural grass.

Rarely. A properly installed turf baseball field drains several inches per hour – light to moderate rain doesn’t affect playability. Heavy storms may cause a brief delay, but nothing like the days-long recovery time that follows heavy rain on a natural grass field.

Every 15-20 years under typical conditions, 12-15 for high-use tournament fields. Signs of end-of-life: fibers that won’t stand up after brushing, widespread fading, lifting seams, infill breakdown. Budget for replacement from day one.

Research is mixed. Modern turf performs significantly better than original AstroTurf. Ball behavior is faster on turf infields – an adjustment for players coming from grass, but one most adapt to quickly. Injury rate comparisons versus natural grass vary by study and surface type.

Yes – including Tropicana Field (Tampa Bay Rays) and Rogers Centre (Toronto Blue Jays). Many MLB stadiums that used turf in the 1970s-80s returned to natural grass, though modern synthetic products have brought some back to artificial surfaces.

For high-use fields with heavy schedules, yes – the advantages of turf fields in playability, consistency, and long-term cost outweigh the higher upfront investment. For low-volume recreational programs with strong maintenance resources, natural grass remains viable.

All synthetic turf fades to some degree – that’s unavoidable with any plastic-based material exposed to UV. Quality turf with UV stabilizers built into the fiber fades very gradually over 15-20 years. Cheaper products without proper UV protection can show noticeable color change within 5-7 years. Choosing a UV-stabilized product is the single biggest factor in maintaining appearance over the full lifespan of artificial turf.

The clearest signs: blades that won’t stand up even after brushing, widespread fading that doesn’t respond to cleaning, lifting seams or edges that create trip hazards, and persistent odors – especially in pet areas – that cleaning can’t resolve. Isolated issues are usually repairable. When problems appear across the whole surface, replacement makes more sense than ongoing repairs.

In extreme heat and sun – Arizona, Nevada, Southern California – expect 10-15 years from UV-stabilized turf. Without proper UV protection built into the fiber, that drops to 8 years or less. Shade structures, lighter-colored infill, and occasional hosing down to reduce surface temperature all help extend the synthetic grass lifespan in high-heat regions.

For dogs, you can count on an 8-12 year lifespan with turf made especially for pets. Typical turf installed as a dog run won’t last as long – a combination of urine, digging, and running wears down fibers and backing faster than standard foot traffic. Getting the correct product spec and maintaining proper cleaning techniques are what keep pet turf functional at the upper end of that range.

Yes, in practical terms – but it’s not a direct comparison. Natural grass does not require “replacement” at all times, but constant expenditure on water, maintenance, and repairs will be necessary for it to continue functioning. Artificial grass has a finite lifespan, but the cost of upkeep is minimal by comparison. Within a 20-year span, the total cost of maintaining artificial turf will likely be less than that of natural grass.

The average artificial turf lifespan for residential installations ranges between 15 to 20 years with proper maintenance and regular usage. Premium quality artificial grass that is correctly installed in a moderate climate zone will even have an estimated life span of up to 25 years. Eight to ten years is the lower end – typically sports fields and heavy-use pet areas.

Not always easy. Standard artificial turf can rarely be recycled due to various materials combined and glued. However, some companies have recently started offering environmentally friendly alternatives – check with the producer before purchasing artificial turf.

Yes. Artificial turf is prone to becoming much hotter than grass surfaces on sunny days. Possible solutions include shade structures, reflective infill, or spraying the turf before using it.

High-quality residential turf: 10-20 years. Artificial turf for sports fields under regular heavy usage: 8-12 years. The quality of UV protection during manufacturing is the most important aspect for outdoor durability.

Yes, but only if the turf is made using materials that have been tested and found to be non-toxic. There are various standards that should be met for safety purposes. One of the main problems that synthetic turf has is its ability to heat up faster than natural grass.

High-quality artificial grass blades (PE, PP, nylon) are nonreactive. UV stabilizers and coloring are added during manufacturing – quality products adhere to safety guidelines and do not contain any heavy metals. The only known issue that may arise is regarding the crumb rubber infill that uses shredded tires. However, if this is important to you, then consider using organic or acrylic-coated sand infill.

Not always – but it depends on your dog and your situation. You need a roof if: your dog is a jumper or climber, you have wildlife (coyotes, hawks) in your area, or you want weather protection from rain. For most dogs in typical suburban settings, a partial shade structure over one section of the enclosed run is sufficient. A roof does add cost and complexity, but it’s worth it for the peace of mind if your dog has any history of scaling fences.

For large dogs (60+ lbs), aim for a minimum of 20-25 feet in length. This gives them enough distance to build up a real run before turning around – which is what actually tires them out. For very large or high-energy breeds (huskies, working dogs, large retrievers), 30-40 feet is even better. If your side yard is shorter than 15 feet, a dog run ideas side of house setup will still work for exercise, but supplement with regular walks to meet a large dog’s needs.

Use your existing house wall and yard fence as two sides of the enclosed space – you’re already halfway there for free. Add a gate at each end of the corridor (the main cost), and use pea gravel as ground cover (cheapest option with good drainage). Basic chain link gates run $100-$200 each. Gravel can be under $100 for a small run. Total budget build: $300-$600. If you want synthetic turf instead of gravel, that’s the next cost step up but worth it for long-term maintenance savings.

Daily solid waste removal is non-negotiable – it keeps odors from compounding. After that: hose the surface down 2-3 times per week, do a deeper rinse weekly, and use an enzyme-based pet odor neutralizer monthly on the potty area. For synthetic turf specifically, occasionally rake against the grain to prevent matting from heavy traffic. The whole process takes less than 10 minutes once you have a maintenance routine. A designated potty corner makes this dramatically easier.

Yes – quality synthetic turf is safe for dogs. Look for products with non-toxic material, no heavy metals, and antimicrobial backing. Pet-specific turf is tested for exactly this use case. The heat concern is real in full-sun runs in hot climates – turf gets warmer than real grass on very hot days – but this is managed with proper shade and access to water, not by avoiding turf altogether.

A basic dog run on side of house – fence posts, wire or chain link, gravel or basic turf – is absolutely a DIY weekend project for someone comfortable with basic tools. More complex builds with concrete footings, pergolas, or full synthetic turf installation are easier and often better done by a professional. Improper base prep is the main reason synthetic turf dog runs develop drainage problems and odor issues. If you’re investing in quality materials, it’s worth having them installed correctly.

Synthetic turf with antimicrobial backing is the top choice for odor control. The key is the drainage system underneath – urine needs to pass through quickly rather than pool. Pet-specific turf products are designed for exactly this. Pea gravel is the budget alternative, but smell builds up over time and is hard to fully rinse out. Whatever you choose, regular maintenance (daily waste removal, weekly rinse) matters more than the material itself.

The practical minimum is about 3 feet for small dogs – enough to turn around and move freely. For medium dogs, aim for at least 4 feet. Large dogs really need 5-6 feet of width to move comfortably without feeling cramped. If your side yard is only 2-3 feet wide, it can still work for small breeds, but it’s tight. Width matters less than length – a narrow but long dog run side of house gives a dog more real exercise than a wider but shorter one.

Smaller lots – common in The Fan, Church Hill, Carytown area, and Scott’s Addition – usually work best with a more compact concrete fire pit design or a round circle pit with a gravel surround. These configurations maximize the usable area around the fire feature while keeping the footprint manageable. We assess the specific dimensions and layout of your backyard during the free site visit and recommend accordingly.

Yes. Wooded lots and properties with established landscaping are common in the Richmond suburbs – particularly in western Chesterfield and parts of Henrico – and we work with those site conditions regularly. Root systems, drainage patterns, and existing hardscape all get assessed during the site visit before any design decisions are made.

Pretty much. Richmond’s outdoor season is genuinely long – comfortable fire pit weather runs from early spring through late fall, and mild winter evenings come up more often than people in northern markets might expect. A well-built fire feature in a Richmond backyard gets real use across most of the calendar year, which is part of what makes the upfront investment in proper construction worthwhile.

It depends on the type of structure and your specific location. Portable above-ground fire pits generally don’t require permits. Permanent in-ground fire pits and outdoor fireplaces typically do, and requirements differ between the City of Richmond, Henrico County, and Chesterfield County. We identify the exact requirements for your address during the site assessment and handle the permit process from there.

Significantly. The clay-heavy soil across much of the Richmond metro – in Henrico, Chesterfield, and the city itself – doesn’t drain naturally. Water accumulates against the base, and Virginia’s freeze-thaw cycles (mild compared to northern states, but still real) cause expansion and contraction that degrades improperly built structures over time. Every fire pit installation we do in Richmond is engineered with a drainage system beneath the base specifically to address this.

We’re a full hardscape and site preparation company. Fire pit installation is one part of what we do – we also handle concrete pads, parking surfaces, drainage systems, grading, and excavation. If your project involves more than the fire feature, we can scope and coordinate the full picture.

Both perform well when the base preparation is done correctly – which is the real answer. Concrete offers more shape flexibility and integrates cleanly into contemporary patio designs. Natural stone and fireproof brick hold heat longer and suit properties with a more traditional or organic landscape. What matters most in Toledo’s climate is what’s underneath either material: compacted base layers, proper drainage, and adequate excavation depth. Get that right and either surface material holds up.

Yes – and in Toledo, this comes up on almost every project. Grading and drainage system installation happen during the site preparation phase specifically to address poor natural drainage before the fire feature goes in. The goal is to engineer water movement away from the base rather than hoping the ground handles it on its own.

Portable above-ground fire pits generally don’t require permits. Permanent in-ground fire pits and outdoor fireplaces typically do, and requirements vary between the City of Toledo and surrounding municipalities like Sylvania, Maumee, and Perrysburg. We identify exactly what’s required for your address during the site assessment and handle the permit process as part of our scope.

Toledo’s position on the old Lake Erie lakebed means the soil is exceptionally clay-heavy and flat – two conditions that create serious drainage problems for outdoor structures. Unlike Columbus or Cincinnati, there’s no natural slope to move water away. Without a properly engineered drainage system under the base, water pools beneath the pad, freezes, and causes structural damage that typically shows up in year two or three. We build every Toledo project with this as the starting assumption.

Most residential installations run one to three days from site preparation through finishing. Larger builds – outdoor fireplaces, custom designs with seating walls, or projects requiring significant grading work – take longer. We give you a realistic project timeline during the estimate, not after we’ve already started.

Yes. Grading and leveling work happens during the site preparation phase before the fire feature goes in. This is especially relevant in older Cleveland neighborhoods and hillside properties in the eastern suburbs where lots aren’t flat. Proper grading also improves drainage, which matters a great deal in Northeast Ohio’s moisture environment.

It depends on the type of structure and your specific location. Portable above-ground fire pits typically don’t require permits. Permanent in-ground fire pits and outdoor fireplaces usually do, and requirements vary between the City of Cleveland, surrounding municipalities, and Cuyahoga County jurisdictions. We identify permit requirements during the initial assessment and handle the process from there.

Cuyahoga County and the surrounding Northeast Ohio area have frost depth requirements that affect foundation and base work for permanent outdoor structures. For permanent fire pits and outdoor fireplaces, base construction needs to account for frost penetration – we assess this during the site visit and build accordingly.

Significantly. The combination of moisture off Lake Erie and Northeast Ohio’s freeze-thaw cycles puts more stress on outdoor structures here than in drier inland markets. Without proper base depth, compaction, and drainage system design, water works under the pad and causes heaving and cracking – often within two winters. Every fire pit installation we do in the Cleveland area is built with these conditions as the baseline assumption, not an afterthought.

Most residential projects run one to three days from site preparation through finishing. More complex builds – larger outdoor fireplaces, custom designs with seating walls, or projects requiring significant grading work beforehand – take longer. We give you a realistic timeline before anything starts.

Beyond aesthetics, the main differences are in texture, heat retention, and integration with the surrounding landscape. Concrete is more flexible in terms of shape and finish options and integrates cleanly into contemporary patio designs. Natural stone and fireproof brick hold heat longer, develop more character over time, and tend to suit properties with established, organic landscaping. We’ll talk through which fits your backyard during the assessment.

es. Sloped lots are something we work with regularly in Cincinnati. Site preparation, grading, and retaining work happen before the fire feature goes in, so the finished result sits level and drains properly regardless of the natural grade of the property.

Cincinnati’s hilly topography means slope and drainage are real considerations for almost every backyard project. Water that pools or runs toward a fire pit base – especially in properties with clay-heavy soil – accelerates freeze-thaw damage significantly. Proper grading and drainage system design before the build is not optional; it’s what determines how long the structure actually lasts.

It depends on the type of fire feature and your specific location. Permanent in-ground fire pits and outdoor fireplaces typically require permits in Cincinnati and Hamilton County; portable above-ground options generally don’t. Requirements also vary in surrounding municipalities like Blue Ash, Norwood, or Montgomery. We identify and handle all permit requirements as part of our standard process.

Most residential fire pit installations take one to three days from site preparation through finishing, depending on complexity, size, and whether additional drainage or grading work is needed. We give you a realistic timeline during the estimate process.

Yes. Integrating a fire pit into an existing patio or deck space is something we plan for specifically during the design phase – including clearance requirements, material compatibility, and structural considerations. It’s one of the most common project types we handle in Columbus.

Central Ohio has areas of clay-heavy soil that retains water and doesn’t drain well on its own. Without a proper drainage system under the base, water accumulates beneath the pad and accelerates freeze-thaw damage. This is one of the main reasons base preparation – not just the surface build – determines how long a fire feature actually lasts.

Columbus and Franklin County permit requirements depend on the type of fire feature and your specific address. Permanent in-ground fire pits and outdoor fireplaces typically require permits; portable or above-ground options often don’t. Requirements can also differ in surrounding suburbs like Worthington, Dublin, or Gahanna. We identify and handle permit requirements as part of every project.

Site Prep LLC is a full hardscape and site preparation company. Beyond fire pit installation, we handle concrete pads, parking surfaces, excavation, drainage systems, and grading. If your backyard project involves more than just the fire feature, we can typically scope and coordinate all of it in one project.

Most residential fire pit installations take one to three days from site preparation through finishing, depending on complexity, size, and whether additional drainage or grading work is needed. We give you a realistic timeline during the estimate process.

Yes. Integrating a fire pit into an existing patio or deck space is something we plan for specifically during the design phase – including clearance requirements, material compatibility, and structural considerations. It’s one of the most common project types we handle in Columbus.

Central Ohio has areas of clay-heavy soil that retains water and doesn’t drain well on its own. Without a proper drainage system under the base, water accumulates beneath the pad and accelerates freeze-thaw damage. This is one of the main reasons base preparation – not just the surface build – determines how long a fire feature actually lasts.

Columbus and Franklin County permit requirements depend on the type of fire feature and your specific address. Permanent in-ground fire pits and outdoor fireplaces typically require permits; portable or above-ground options often don’t. Requirements can also differ in surrounding suburbs like Worthington, Dublin, or Gahanna. We identify and handle permit requirements as part of every project.

A licensed hardscape and site preparation contractor – like Site Prep LLC – handles the full scope: base work, drainage, permits, and the actual build. A landscaping company doing fire pits on the side typically focuses on the visible elements and outsources or skips the critical foundational work. That’s usually where problems start.

Yes, and it’s one of the more common project types we handle. We assess clearances, material compatibility, and weight or structural considerations before recommending placement and design. Integration with existing hardscape is something we plan for specifically.

Timeline varies by season and current workload. Contact us for a free estimate and we’ll give you a realistic project start date based on where you are in Ohio and what your project involves.

Ohio’s variable soils and wet spring conditions make drainage-ready base construction essential. We typically use compacted crushed stone or gravel bases beneath concrete pads to allow water movement and prevent the freeze-thaw cracking that ruins improperly built fire features.

It depends on your municipality and the type of fire feature. Portable fire pits typically don’t require permits. Permanent in-ground fire pits and outdoor fireplaces often do, and requirements vary by city and township across Ohio. During our site assessment, we identify what’s needed and handle the permit process as part of our scope.

Both. Site Prep LLC is a full outdoor fireplace builder as well as a fire pit installer. We design and construct permanent outdoor fireplaces using brick, stone, and concrete block – matched to your home’s exterior and built on a proper foundation.

Yes – and we do this regularly. Integrating a fire pit into an existing patio space or deck area is something we plan for during the design phase. We assess clearances, material compatibility, and structural considerations before recommending placement.

Most residential fire pit projects take one to three days from site preparation through finishing, depending on size, design complexity, and whether additional work like drainage or grading is needed. We give you a realistic timeline before we start.

Given Albany’s freeze-thaw cycles, proper drainage under the pad is critical. We commonly use compacted crushed stone or gravel bases beneath concrete slabs. The base prevents water from pooling under the structure, which is what causes cracking and shifting over time.

It depends on the type. Portable fire pits generally don’t require permits. Permanent in-ground fire pits and outdoor fireplaces often do, and requirements vary by municipality. As your fire pit contractor, Site Prep LLC identifies permit requirements during the initial assessment and handles the paperwork so you don’t have to.

We handle everything in-house. Site assessment, permits, excavation, drainage, and construction – all Site Prep LLC, no third-party subcontractors. That means one point of contact and full accountability throughout the project.

Concrete gives you more design flexibility – basically any shape, any texture, seamless integration with a deck or patio. Natural stone and fireproof brick have a more traditional, organic look and excellent heat retention. Both hold up well in Rochester’s climate when properly installed. The right choice depends on your aesthetic and how the space is designed.

Sometimes yes, sometimes no – it depends on the condition and thickness of the existing slab. We assess your current hardscape during the site visit and give you an honest answer. In many cases we can integrate a fire feature directly into an existing patio without tearing it up.

Most residential fire pit builds take one to two days on-site. Larger custom designs with seating walls, or outdoor fireplaces requiring foundation work, can run three to five days. We’ll give you a specific timeline during the planning phase – no vague estimates.

Significantly. The freeze-thaw cycle here is severe, and clay-heavy soil in many neighborhoods holds water poorly. A fire pit without a proper drainage system underneath it will shift, crack, or heave within a couple of seasons. We build with Rochester’s climate in mind from the start – which is why our installations hold up when others don’t.

It depends on the type of installation and your specific municipality. A portable or above-ground fire bowl typically doesn’t need a permit, but a built-in concrete or stone fire pit often does – and a permanent outdoor fireplace almost always requires one. We research the permit requirements for your location and handle the filing as part of our service.

Fire pits are open on all sides – great for groups, casual use, flexibility. Outdoor fireplaces are directional, more formal, and create a stronger visual anchor in the landscape. If your backyard is smaller or you want something more versatile, go with a fire pit. If you want a statement piece and a more structured outdoor room, an outdoor fireplace is worth the additional investment. We’ll help you think through it during the consultation.

Yes. We serve Westchester, Long Island, Rockland County, and surrounding areas. If you’re in the greater New York region, reach out and we’ll confirm coverage for your location.

Depends on the structure and materials involved. We assess the existing surface during the site visit and let you know what’s feasible. In many cases, we can integrate a fire feature seamlessly into an existing hardscape.

Concrete and natural stone both hold up well to New York winters – but only when installed with a proper drainage system underneath. Without drainage, water gets trapped beneath the pad, freezes, and the whole structure starts heaving and cracking. That’s why base preparation matters just as much as the material itself.

Most residential fire pit projects take one to two days once we’re on-site. Larger custom builds with seating walls, or outdoor fireplaces with foundation work, can take three to five days. We’ll give you a clear timeline during the planning phase.

It depends on the type and location. Portable fire pits typically don’t require permits, but a built-in concrete or stone fire pit – and especially a permanent outdoor fireplace – usually does. Requirements vary by municipality. Site Prep LLC handles the permit research and filing as part of our process, so you don’t have to figure it out yourself.

A licensed fire pit contractor handles the full scope: site prep, excavation, drainage, base construction, permitting, and the build itself. A landscaper offering fire pits as an add-on service may not have the structural and site preparation background to make a permanent installation actually last. For anything built into the ground or attached to a hardscape, the distinction matters significantly.

Yes, frequently. We assess the existing surface and what’s underneath it during our site visit. In many cases, a fire pit or fireplace can be integrated directly into an existing hardscape. Sometimes minor grading or drainage adjustments are needed first – we’ll tell you upfront if that’s the case.

Concrete and natural stone are both excellent choices for NJ’s freeze-thaw cycles – provided the base work is done correctly. That means proper drainage and a well-compacted base layer that prevents frost heaving. This is exactly why site preparation matters as much as material selection.

A standard outdoor fire pit installation typically takes one to two days once site prep is complete. A full outdoor fireplace build runs longer – usually three to five days depending on the complexity of the design and foundation work. We give you a clear timeline during the planning phase, before any work starts.

It depends on your municipality and what you’re building. Freestanding portable fire pits generally don’t require permits. Permanent fire pit installations – especially concrete or stone builds – often do, and outdoor fireplaces almost always require one as a permanent structure. We research your local requirements during the site assessment and handle the permit process on your behalf.

A licensed fire pit contractor like Site Prep LLC handles site preparation, excavation, drainage, base construction, and permitting – not just the visible surface work. A general landscaper may offer fire pits as an add-on service without the structural background. For a permanent installation that lasts, the distinction matters.

Yes, in many cases. It depends on the existing surface, drainage, and structural conditions underneath. We assess this during our site visit. Sometimes minor site preparation adjustments are needed first.

A standard fire pit installation typically takes one to two days once the site prep is complete. A full outdoor fireplace build takes longer – usually several days depending on complexity. We’ll give you a clear timeline during the planning phase.

It depends on your municipality and the scope of the project. Portable fire pits typically don’t require permits. Permanent concrete or stone fire pits sometimes do. Outdoor fireplaces – which are permanent structures – almost always require a permit. As your fire pit contractor, we handle the permit research and applications so you don’t have to.

It varies quite a bit depending on size, materials, and site conditions. A basic gravel-surround fire pit installation starts lower than a full concrete fire pit with seating walls. We provide free estimates after assessing your specific site – that’s the only honest way to give you an accurate number.

We serve communities across Connecticut – see the full service area below.

Both hold up well when built correctly. Concrete offers more design flexibility and a cleaner look. Natural stone and fireproof brick suit more traditional or wooded settings and develop character over time. The right call depends on your yard’s existing design, not just the material itself. We’ll walk through both options with you during the consultation.

More than most people expect. A well-built fire pit with proper drainage doesn’t degrade from winter exposure – it just sits there until you’re ready to use it again. And in Connecticut, fall evenings are genuinely some of the best times to have a fire. The seasons that make New England worth living in are the same ones that make a fire feature most worthwhile.

Connecticut’s frost line runs between 36 and 48 inches depending on the region. When the ground freezes and thaws repeatedly through winter, structures built on shallow foundations move – they heave, crack, and lose drainage over time. We build to the appropriate frost depth for your site, which is what makes the difference between a fire feature that holds up and one that needs attention within two years.

In most Connecticut towns, yes. Built-in fire pits and outdoor fireplaces are typically classified as permanent structures and require a local permit. Requirements are set at the town level and vary considerably – Greenwich is different from Windham, Stamford is different from Tolland. Site Prep LLC identifies what applies to your specific location during the site assessment and manages the permit process as part of the installation.

We serve communities across Maryland – see the full service area below.

Most fire pit installations complete in one to three days. Outdoor fireplace builds take longer due to foundation work and masonry time. We give you an accurate timeline during the planning phase – before any work begins.

A gravel-pad fire pit area is the most accessible starting point. A full outdoor fireplace build with a concrete foundation, stone or brick surround, and chimney is a significantly larger investment – but also a permanent architectural feature. We provide free estimates with no obligation so you can get a real number before committing to anything.

Maryland’s freeze-thaw cycles – especially in central and western Maryland – put real stress on outdoor structures. A fire pit built on a shallow or poorly drained base will crack and shift. We build on properly prepared bases with adequate drainage from the start, which is what makes the difference between a feature that lasts and one that doesn’t.

In most Maryland counties and municipalities, built-in fire pits and outdoor fireplaces are classified as permanent structures and require permits. Requirements vary by jurisdiction – what applies in Montgomery County is different from what applies on the Eastern Shore. Site Prep LLC identifies the specific requirements during the site assessment and manages the permit process as part of the installation.

Yes. We serve Delaware broadly and also work in nearby communities across the region – see the service area below.

Most fire pit installations take one to three days. Outdoor fireplace builds run longer due to foundation work and masonry time. We’ll give you an accurate timeline during the planning phase – before any work starts.

Fire pits are open features that radiate heat in all directions – great for groups. Outdoor fireplaces are directional, more formal, and function as permanent architectural elements in a landscape or hardscape design. The right choice depends on your yard size, how you use the space, and what look you’re going for. We’ll help you work that out during the consultation.

Delaware’s soil conditions vary across the state – from sandy soils near the coast to heavier clay further inland. Gravel and crushed stone bases drain well and work in most conditions. Concrete bases give a more finished, permanent result. We assess your specific site and recommend accordingly before any planning happens.

Built-in fire pits and outdoor fireplaces are typically classified as permanent structures and require permits in most Delaware municipalities. Requirements vary by city and county. Site Prep LLC identifies what’s needed during the site assessment and handles the permit process as part of the installation – you don’t have to chase it yourself.

Yes. We serve Pittsburgh and the broader surrounding region – see the service area below for nearby communities.

Most fire pit installations complete in one to three days. Outdoor fireplace builds take longer due to foundation work and masonry time. We’ll give you an honest timeline during the planning phase – before any work starts.

Range varies based on size, materials, and site complexity. A gravel-pad fire pit area is the most accessible starting point. A full outdoor fireplace build with a concrete foundation and seating walls is a more significant investment. We provide free estimates with no obligation – the best way to get a real number is to have us look at the property.

It depends on your site’s drainage situation and your design goals. Gravel and crushed stone drain well and work in most yard conditions. Concrete gives a more finished, permanent look. Artificial turf works well in surrounding areas. We assess your specific yard conditions and recommend what makes sense before we plan anything.

Built-in fire pits and outdoor fireplaces are typically classified as permanent structures and usually require a permit through your municipality. Requirements vary by borough and township across the Pittsburgh region. Site Prep LLC flags permit requirements during the site assessment and handles the process as part of the installation.

Yes. We serve the broader Lancaster region and surrounding communities – see the service area section below.

It depends on your drainage situation and design goals. Gravel and crushed stone are practical and drain well. Concrete gives a cleaner, more permanent look. Artificial turf works well for surrounding areas. We assess your specific site conditions and recommend accordingly.

Fire pits are open, 360-degree gathering features – great for groups. Outdoor fireplaces are directional, more formal, and have higher visual impact as a design element. The right choice depends on your yard size, how you entertain, and what kind of look you’re going for. We’ll help you figure that out during the consultation.

Most fire pit installations take one to three days, depending on the scope of work. A simple gravel-base fire pit area is quicker; a full outdoor fireplace build with a concrete foundation and seating walls takes longer. We’ll give you a realistic timeline during the planning phase.

It depends on the structure. A built-in concrete fire pit or outdoor fireplace is typically classified as a permanent structure and will require a permit in most Lancaster-area municipalities. Site Prep LLC handles the permit process as part of our installation service – we flag what’s needed during the site assessment.

There is no one-size-fits-all answer because it depends on the market and buyer preferences. If there are water shortages or drought conditions in an area, synthetic grass may increase the attractiveness of the home. Otherwise, it may have no effect or even a slight negative impact. Overall, if properly installed and well-maintained, synthetic grass is usually looked upon favorably by buyers focused on low-maintenance living.

Often, yes – especially if the current lawn looks patchy, tired, or expensive to maintain. In many cases, the biggest gain is not just price. It is how much more market-ready the property feels.

Not in a direct, guaranteed way. But it can improve curb appeal, reduce maintenance concerns, and make the home feel easier to live with, which can strengthen buyer interest.

Usually not. High-quality turf that looks natural and drains properly is more likely to help than hurt. Problems usually come from poor materials or weak installation.

In many cases, yes. It can make the yard look greener, cleaner, and lower maintenance throughout the year, which often increases buyer appeal.

Keep it simple. Clean borders, defined zones, consistent materials, soft lighting, and a neat surface usually do more than trying to add too many design elements at once.

Usually, the most valuable upgrades are the ones that improve usability. Turf, seating areas, privacy, drainage, and lighting tend to have the strongest impact because buyers understand their benefit immediately.

Yes, especially when it improves both function and appearance. Buyers respond better to yards that look clean, usable, and easy to maintain than to spaces filled with decorative features that add extra work.

Avoid highly personal remodels, overbuilt luxury updates, and cheap cosmetic shortcuts. Before listing, focus on improvements that increase value in a broad, buyer-friendly way instead of niche ideas that only appeal to a few people.

It can be. In the right market, it is one of the more easy and practical ways to improve curb appeal, reduce upkeep, and make the home feel more polished. That can support both resale appeal and valuation.

Yes, especially when they improve usability and appearance. Patios, drainage fixes, artificial turf, and clean front-entry updates are all home upgrades that add value because they improve first impressions and reduce future maintenance concerns.

Minor kitchen remodels, fresh paint, bathroom updates, entry improvements, and landscaping-related updates often rank among the highest roi home improvements. In many cases, the simplest updates have the best payback rate.

The strongest performers are usually kitchens, bathrooms, paint, flooring, curb appeal, energy-efficient updates, and outdoor living improvements. These are the home improvements that add value because buyers see them quickly and understand their benefit immediately.

Yes, it can, and it is done so commonly. Artificial grass sports fields provide year-round playability, consistent surface conditions, and reduced maintenance costs. Numerous professional leagues and universities have switched to artificial grass surfaces. Surface temperature and feel underfoot remain the key concerns.

Contemporary artificial grass, especially those made of polyethylene monofilament fiber with multi-color blades and thatch, is almost indistinguishable from natural grass at first glance. At close inspection or when stepped upon, however, their distinction is clear. When viewed from afar or as far as aesthetics are concerned, top-grade artificial grass performs impressively.

On average, artificial turf can be used for up to 10-15 years before replacement is required. If natural grass is regularly maintained, it can be used for as long as needed.

This question cannot be answered with certainty since both materials have their pros and cons. The choice between artificial turf and natural grass should depend on the intended use of the surface, your climate, budget, and maintenance tolerance.

Yes, this is true. The temperature of synthetic turf tends to be significantly higher when exposed to sunlight, considering that the material cannot cool down due to its inability to evaporate water. This is the main practical disadvantage of artificial turf in warm climates.

Short to medium – from 15 mm to 25 mm is fine. Short pile is more durable, easy to keep clean, drains well, and withstands wear in areas where debris can easily collect.

Expensive grass will typically perform better due to higher quality fibers and backing materials. However, if it’s used on a balcony with little activity, there’s no need to go for grass engineered to resist wear like nylon.

Go for PE or blended fibers, PU backing that is not made of latex, antimicrobial infill, and short pile height. Drainage should be at least 30+ inches per hour. Latex backing must be avoided in all cases with dogs.

For residential use – polyethylene. For sports – nylon. For budget commercial applications – polypropylene.

Nylon. It is the toughest artificial grass and can withstand wear, tear, high temperatures, and compression unlike any other material. Its only disadvantage is cost.

Polyethylene monofilament grass that comes with a thatch layer and multicolor blade coloring. The thatch creates a realistic resemblance to natural dead grass beneath the blades, giving it an authentic appearance.

For routine cleaning – mild dish soap mixed with water. For odors, especially pet-related – an enzyme turf cleaner. For light stains – a 50/50 white vinegar and water solution.

Not at all. Weekly rinsing and brushing are the two key activities. Add an enzyme treatment if you have pets. It’s genuinely one of the lowest-maintenance flooring options for outdoor spaces.

Rinse regularly and treat with an enzyme turf cleaner – especially if pets use the space. Enzyme cleaners break down the odor-causing compounds at the source. For mild smells, a diluted vinegar and water mixture works well.

No. A pressure washer is too powerful for artificial turf – the spray damages fibers, destroys seams, and displaces infill. Stick to a regular garden hose.

It is better not to. Bleach can be too harsh for the fibers and backing, and it may leave behind a strong chemical smell. A turf-safe cleaner or mild soap and water is usually a much safer choice.

Yes. Baking soda can help absorb mild odor, especially in pet areas, and many homeowners use it before rinsing. It is useful as part of a cleanup routine, but it is not a full replacement for proper cleaning or enzyme treatment.

Sometimes, but carefully. Low pressure may help with certain messes, while strong pressure can move infill, stress seams, and flatten fibers. If you use it, keep the spray controlled and avoid blasting one area too closely.

Yes, in small amounts mixed with water. It is commonly used for spot cleaning dirt or greasy marks. The key is not overdoing it – too much soap can leave residue behind, and that residue tends to attract fresh dirt.

You can, but plain white vinegar is usually the safer and more predictable option. Synthetic vinegar may work for minor cleaning, though it should still be diluted and tested on a small area first before wider use.

Yes, diluted white vinegar can help with light cleaning and mild odor control. It works best for small surface messes, not deep sanitation. If the issue is pet smell or heavy buildup, vinegar alone usually will not do enough.

Site Prep LLC is a full hardscape and site preparation company. Beyond fire pit installation, we handle concrete pads, parking surfaces, excavation, drainage systems, and grading. If your backyard project involves more than just the fire feature, we can typically scope and coordinate all of it in one project.

Modern artificial turf is safe for both pets and kids. Quality products use non-toxic materials and proper drainage prevents bacteria buildup. Choose antimicrobial infill (zeolite or coated sand) for pet areas. The turf stays cooler than concrete or asphalt, though it does heat up in direct sun. For pet-specific considerations and ongoing care, see our guide How Much Does it Cost to Install Pet Turf.

Moderate difficulty. The actual process is straightforward – it’s basically careful landscaping – but it’s physically demanding (digging, moving materials, compacting) and requires attention to detail. Most challenging aspects are achieving level base compaction, cutting and fitting turf precisely, and creating seamless joins. If you’ve tackled landscaping projects before, you can definitely handle putting down fake grass yourself.

Ground prep involves: removing existing vegetation and debris, excavating 3-4 inches below desired grade, creating 1-2% drainage slope, laying weed barrier (optional), spreading 2-4 inch base layer of crushed aggregate, and compacting thoroughly with plate compactor. Proper prep takes the bulk of installation time but determines final results. Rush it, and you’ll regret it.

Absolutely. DIY synthetic turf installation is doable for homeowners with basic landscaping skills and proper tools. Expect to invest 1-3 days for an average backyard. The process is physical (excavation, compaction) but not technically complex. Biggest challenges are heavy lifting, achieving proper base compaction, and creating invisible seams. Following proper procedures and taking time produces professional-looking results.

Class II road base (crushed miscellaneous base) is most popular – it compacts well, drains efficiently, and costs less than specialized materials. Crushed stone (¾ inch minus) works well in high-drainage areas. Decomposed granite is excellent for warm, dry climates. All three perform well when properly compacted – choose based on local availability and climate.

The standard sub-base consists of: weed barrier fabric (optional, especially if you have pets), 2-4 inches of Class II road base or crushed stone, thoroughly compacted. Some installations add gopher wire for rodent prevention. This layered approach provides drainage, stability, and prevents vegetation from pushing through.

With proper installation (including base layer), quality synthetic grass lasts 10-15 years – sometimes longer in residential applications with moderate use. Lifespan depends on material quality, UV stabilization, infill type, traffic levels, and maintenance. Cheap turf or improper installation shortens life to 5-7 years or less.

You can, but you shouldn’t. Direct installation on soil leads to settling, poor drainage, weed growth, and shortened turf lifespan. The base layer (2-4 inches of compacted aggregate) provides stability, drainage, and proper support. Skipping it is a false economy – you’ll spend more fixing problems than you saved skipping proper prep.

A typical fire pit project in the Wilmington area usually takes one to two days to install. An outdoor fireplace project usually takes about three to five days, depending on the project and the conditions at the site. We’ll give you a honest estimate, not a wish-list estimate that falls apart once we get started!

An outdoor fire pit has no back, so the heat and light go in every direction, which is great for a group setting. An outdoor fireplace has a back wall and a chimney, which directs the heat forward and controls the smoke much better. An outdoor fireplace also has much more “wow factor” and a longer build-out time, but it also changes the backyard in a way that a fire pit just cannot.

In most instances, yes. The assessment will be done based on the condition and depth of the existing concrete to ensure it is suitable for installation without further reinforcement. It is one of the common installations.

Most building codes and fire safety standards require at least a 10-foot clearance from any structure, be it the home itself, fences, basement exits, decks, or overhead obstructions. We verify this during our assessment.

This is a bit more than most people would guess. A simple gravel fire pit with a concrete ring is on the lower end of the price spectrum. A natural stone fire pit with a seating wall and drainage system is a much more involved process. While most fire pits in the Wilmington DE area range between $800 and $5,000+, the price can vary widely.

That depends on the scope of the project. If the fire pit is simple and in the ground or above the ground in a backyard in the Wilmington area, then the answer is no. But if the fire pit is a permanent structure with concrete and a seating wall, then the answer is yes. Site Prep can assist with the permitting process for all of our permanent fire pit installations. We are familiar with the building codes in the Wilmington area and don’t take any shortcuts with the permitting process.

A typical fire pit installation usually takes one to two days. An outdoor fireplace construction may require three to five days. During our consultation, we will be able to give you a more realistic timeframe, not a best-case scenario.

A fire pit is completely open on all sides. Heat is distributed in all directions. It is good for a group setting. An outdoor fireplace has a back wall and a chimney. Heat is directed outward and smoke is directed upward. Fireplaces are larger and more expensive; however, they can greatly change the look and feel of your outdoor living space.

Yes, it can be. In most instances, this is a very common and easy process. It is determined if the pre-existing concrete is strong enough to support a fire pit or if it will need to be reinforced. It is a very common and easy process.

In most areas, local fire safety guidelines recommend that a fire pit be at least 10 feet away from any structure, be it a house, fence, basement exit, deck, or overhang. All these factors are taken into consideration for each site prior to design.

For a simple portable or in-ground fire pit, the answer is usually no. However, for permanent fire pits or outdoor fireplaces like built-in concrete fire pits, the answer is yes.

Yes. Site Prep works with homeowners, property managers, general contractors, and commercial builders. The process and standards are the same regardless of project size – proper base, proper pour, proper finish.

Initial set takes 24-48 hours for light foot traffic. Full cure is typically 28 days, though the walkway can handle normal residential use well before that. We’ll give you a clear timeline based on weather conditions and mix design.

Sometimes yes, sometimes no. Isolated cracks and minor lifting can often be addressed with targeted repair or concrete walkway lifting techniques. Widespread cracking, base failure, or severe trip hazards usually warrant full replacement. We assess each situation honestly and recommend the fix that actually makes sense long-term.

Cost depends on size, thickness, finish type, and site conditions. A standard broom-finish walkway runs less than a stamped concrete walkway with pattern and color work. The best way to get an accurate number is to contact us for a site visit – phone estimates for concrete work are almost always off in one direction or another.

A properly installed concrete walkway with a solid base and adequate thickness typically lasts 25 to 40 years. The main factors that shorten that lifespan are poor base prep, inadequate drainage, and skipping the curing process – all things Site Prep LLC takes seriously on every job.

Concrete breaking is demolishing the material into smaller parts using manual or powered tools. Concrete sawing implies cutting out damaged slab parts or altering existing structures with the help of specialized saws.

You can opt for concrete removal in cold seasons, but it requires thoughtful intervention, specific equipment maintenance, and additional safety measures.

Yes, we provide an all-encompassing range of concrete demolition services, including disposal and transportation. You don’t have to worry about concrete remnants and dust sprinkled around your site after the work is over.

Concrete removal can pose serious safety risks if done improperly. Various jurisdictions have distinct rules on permits, working hours, dust suppression, etc.

Heavy concrete requires an understanding of specialized demolition techniques, as it can cause injuries if you lack professional knowledge and skills. You’d better hire an expert demolition company than risk your own health.

The price depends on several factors, such as the amount, surface, reinforcement, object location, and optional related services. The expenditures for concrete demolition, removal, and disposal may range from $590 to around $2,800.

The causes may vary from natural ground movement and temperature fluctuations to improper installation and heavy loading. We apply practical techniques to minimize the risks, like adding a gravel base and reinforcement to make concrete more sturdy and prevent early replacement.

Spring and early autumn are considered the go-to seasons for laying a patio. Mostly dry weather, mild temperatures, and stable ground provide ideal circumstances for efficient work. Professionals with rich expertise in concrete projects can provide quality results in the low seasons too.

Concrete can become slippery in a wet environment, so it’s crucial to take care of the safety aspect. When installing a poured concrete patio, we apply pro-grade techniques for extra traction.

Yes, we provide free and no-obligation estimates for demolition projects. You can request a quote to initiate the process launch.

Demolition implies taking down a structure and clearing the debris, while deconstruction is a more careful process aimed at preserving materials for future use or recycling.

Preparation for demolition involves choosing a licensed contractor, applying for permits, conducting an inspection for hazardous materials, informing your neighbors, and disconnecting all your services.

Most demolition projects require public liability insurance to protect the property owner and cover the expenditures.

Yes, demolition involves compliance with local, state, and federal regulations to be considered legal. This means preparing essential documentation, submitting an application, paying fees, and scheduling a site inspection to obtain necessary permits.

Small buildings require several days to a week to be torn down, while more complex structures may take longer to demolish. The entire demolition process, including the preparatory stage and debris removal, can extend the timeline up to 2 months.

Professional skills of a demolition specialist are backed up by a high school degree, a GED test, or relevant education. Our certified workers are trained in construction management, effectively operate heavy machinery, and know safety regulations, which results in a safe structural removal.

We will discuss this with you after your project has been assessed. For active sewer failures, you can contact us to discuss your project.

The cost depends on various factors such as length, depth, and access to your sewer line. We will discuss this with you after assessing your project site. There are no hidden costs.

Yes. A permit is required for your project. At Site Prep, we obtain all necessary permits as part of our service to ensure that your project is inspected and fully complies with local codes.

Most sewer line projects take only one to three days to complete. However, some projects may take longer. We will discuss this with you before commencing work.

Yes. We offer pipe bursting and lining. Open-cut excavation is used on severely collapsed or misaligned pipes.

The decision to repair or replace your sewer line depends on its condition and how much damage has been done. For instance, if there is only one crack or a problem with one joint, then you can consider repairing your sewer line. On the contrary, if your sewer line is extensively damaged or has been infiltrated by tree roots throughout its length, or if your sewer line is frequently backing up due to its collapse or has been in service for over 50 years (for clay or cast iron), then you should consider replacing your sewer line. Our team will assess your sewer line before any work is done on it.

Yes – it’s one of the most common scenarios we handle. We use proper shoring techniques to excavate safely near existing structures.

Usually, yes. Foundation digs, utility work, and drainage projects typically require them. Site Prep handles permitting as part of our service.

Simple grading might wrap in a day. A basement dig-out or addition prep can run a few days to two weeks. We give you a timeline before starting.

Digging for foundations and basements, trenching for utilities, site grading, soil compaction, demolition, and drainage shaping – anything involving earth removal to prepare a property.

Easy – just contact us directly. We’ll schedule a site visit, assess the scope of work, and provide a clear written estimate. No pressure, no vague ballpark numbers over the phone.

Yes – this is actually one of the more common scenarios we deal with in Philadelphia’s dense neighborhoods. We use appropriate equipment and shoring methods to excavate safely near existing foundations, basement walls, or adjacent structures without causing damage.

Often, yes. Permit requirements vary by project type and location. Utility work, structural excavation, and anything affecting drainage typically requires permits through the City of Philadelphia’s L&I department. Site Prep LLC handles the permit process as part of our service.

It depends on scope. A basic backyard grading or shed removal can wrap up in a day or two. More involved work – like a basement dig-out or full site prep for an addition – can run anywhere from three days to two weeks. We give you a timeline estimate before work starts so you can plan accordingly.

Excavation covers a wide range of ground-level work: digging for foundations and basements, trenching for utilities (sewer lines, water mains, electrical conduit), site grading and leveling, soil compaction, concrete and structure demolition, drainage shaping, and backfill. Basically – anything that involves moving earth to prepare a site for construction or improvement.

Technically possible, but not recommended. Philadelphia and Pennsylvania regulations require permits, soil testing, and inspections that involve licensed professionals. Improper installation creates serious problems — sewage backups, groundwater contamination, failed inspections, and costly repairs. Most municipalities won’t approve DIY installations, and mistakes can cost far more than hiring qualified contractors from the start. At Site Prep LLC, we handle everything from permits to final inspection, ensuring your system meets all local codes and functions reliably for decades. Contact us for a free consultation and let our experienced team take care of the entire process.

A properly maintained septic tank lasts 20 to 40 years. Concrete tanks tend toward the longer end, while steel tanks may fail sooner due to corrosion. The drain field typically needs replacement before the tank itself. Regular pumping every 3-5 years, avoiding harsh chemicals, and watching what goes down your drains all extend system lifespan significantly.

Most septic tanks are buried 4 inches to 4 feet below ground level. The exact depth depends on your local codes, frost line, and property slope. Tank inlet and outlet pipes need proper pitch for gravity flow, so terrain often dictates placement. During installation, we calculate the optimal depth based on your specific site conditions and Philadelphia-area requirements.

Septic tank installation costs vary significantly based on tank size, material type, soil conditions, and property layout. Permit fees and local requirements in Philadelphia also affect the final price. Every property is different, so we recommend getting a site evaluation for an accurate estimate. For a detailed breakdown of pricing factors, check out our guide on cost to install new septic tank.

Start with basics: cleanup, trimming overgrown plants, edging the lawn. These simple tasks cost almost nothing but create immediate visual impact. For budget improvements, consider gravel patios instead of pavers, reseeding instead of sod, and fresh mulch in garden beds. If drainage is your main issue, extending downspouts or minor regrading often solves the problem without major excavation.

Functional outdoor living spaces deliver the best returns. Patios, decks, and defined entertainment areas expand your usable square footage and appeal to nearly every buyer. Proper drainage and grading matter too — they’re not exciting, but they prevent foundation damage and costly repairs. Fire pits, quality lighting, and low-maintenance landscaping round out the list of improvements that consistently add value without requiring extensive upkeep.

Yes, backyard renovation is typically a smart investment. Most homeowners recoup 50-80% of their renovation costs when selling, but the real value goes beyond resale numbers. You’ll use this space daily — for family gatherings, relaxing after work, or simply enjoying your morning coffee outdoors.

There’s also a practical side to consider. Neglected backyards with drainage problems, uneven terrain, or deteriorating hardscapes can actually decrease your home’s value. Buyers notice these issues immediately and factor repair costs into their offers. A well-maintained outdoor space signals that the entire property has been cared for.

Concrete contractors specialize in excavation, site preparation, and concrete pouring for various construction projects. Their services include preparing the ground, grading the site, setting up formwork, and pouring concrete for foundations, driveways, patios, sidewalks, and more. Contractors ensure that the site is level, reinforced, and ready for a durable, long-lasting concrete structure. At SitePrep, we handle every stage of the process to ensure a solid foundation for your project.

When choosing a concrete contractor for site preparation and foundation work, consider:

  • Experience in excavation and concrete pouring
  • Licensed and insured for safety and reliability
  • Transparent pricing with detailed estimates
  • Positive reviews and proven track record
  • Effective communication to keep your project on track

At SitePrep, we take pride in our skilled team and commitment to completing projects on time and within budget.

For optimal results, concrete should be poured during mild weather, usually in spring or fall, when temperatures range from 50°F to 70°F (10°C–21°C). This ensures proper curing and minimizes the risk of cracking. However, at “Site Prep LLC”, we have the expertise to work in different weather conditions, taking special care in extreme temperatures to ensure high-quality results.

A concrete contractor is a specialized professional who handles all aspects of concrete work, including excavation, site prep, foundation pouring, and finishing. At SitePrep, we ensure the site is thoroughly prepared, levelled, and reinforced before concrete is poured, providing a strong and stable foundation for construction projects.

The average cost to pour concrete ranges from $6 to $12 per square foot, depending on the project size, thickness, design complexity, and local labor rates. Decorative finishes, reinforced slabs, or special mixes can increase the price. Always ask for a detailed quote before starting work.

Yes. Most sewer installations, replacements, or major repairs require a permit from the local municipality. We take care of the permit process and make sure your project follows all legal requirements.

Yes, whenever possible. Trenchless repair lets us fix or replace damaged sections of pipe without digging up your yard or driveway. It’s faster, cleaner, and often more cost-effective than traditional methods.

Small repairs can often be done in a few hours. Full replacements might take one to three days, depending on the soil, depth, and access to the line. After inspection, we’ll give you a clear timeline before starting any work.

We work with both residential and commercial sewer systems — everything from small household drains to large municipal lines. Our equipment allows us to clean, inspect, and repair systems of any size.

The cost depends on what’s wrong and how deep the line is. A simple repair is usually cheaper, while full replacements take more time and materials. We always provide an upfront estimate after inspecting the issue so there are no surprises.

Yes. Sewer issues can’t wait, so our team provides emergency service for clogs, backups, and leaks. A technician can arrive quickly, assess the situation, and start the repair right away.

Sewer cleaning removes blockages, grease, and buildup inside the pipes using tools like hydro jets or augers. Sewer repair is needed when a pipe is cracked, collapsed, or otherwise damaged — often requiring replacement or relining.

Most homeowners should schedule an inspection or cleaning every 18 to 24 months. Regular maintenance helps prevent serious blockages and costly repairs. Older systems or properties with large trees may need more frequent checks.

Common warning signs include slow drains, gurgling sounds from toilets, unpleasant odors, or water backing up in sinks or showers. In some cases, wet spots in the yard may indicate a break underground. If you notice more than one drain acting up, it’s best to call a technician for a camera inspection.

Before excavation begins, clear the area of debris, plants, or structures that may obstruct machinery. Mark underground utilities and ensure equipment and operators have safe, easy access to the site.

We work with private homeowners and large contractors. We maintain the same professionalism, quality, and safety on every project, regardless of size.

Yes, we handle both full and partial excavation projects. You can hire us for foundation digging, pool excavation, trenching, or other specific tasks as needed.

The duration depends on the project size, weather conditions, and soil complexity. Most residential excavations take between several days and one week, while larger commercial projects may require more time.

Soil and debris removal are usually included in the project cost. If needed, we can list this as a separate item. All materials are removed safely and in compliance with environmental standards.

Excavation costs are based on project size, soil type, excavation depth, site accessibility, and waste removal. We provide a clear, itemized estimate after reviewing these details.

In most areas, a permit is required if excavation could impact nearby buildings, utilities, or drainage systems. Our team will check local regulations and assist with obtaining necessary approvals before work begins.

We offer a full range of excavation services, including site preparation, trenching, foundation digging, grading, drainage, sewer, pool, and driveway excavation. All services use modern equipment and experienced professionals.

The price for detailed excavation depends on multiple factors — soil composition, depth, site access, and technical requirements. Precision work, such as foundations, retaining walls, or drainage systems, often requires extra time and equipment. We always prepare an individual estimate after a site inspection.

Excavation is costly due to the need for heavy machinery, skilled operators, fuel, maintenance, permits, and proper waste removal. The process prioritizes safety, precision, and long-term structural stability.

The three main types are topsoil, earth, and rock excavation. Each requires specific machinery and techniques suited to the material and project purpose.

Excavation rates vary based on equipment, soil conditions, project complexity, and location. Projects with rocky or clay-heavy soil may require specialized machinery and skilled operators. We provide a detailed quote after assessing your site and project requirements.

Excavation services involve professionally removing soil, rocks, or debris to prepare land for construction, drainage, or landscaping. This initial step ensures the site is level, stable, and ready for development.

The cost of building a foundation depends on many variables — including the type of foundation, soil conditions, site prep requirements, and the overall complexity of the project. Factors like drainage, grading, and local regulations can also influence the final price.

For a detailed look at what affects foundation pricing and how to estimate your project costs, explore our guide on foundation costs.

A foundation is the structural base that supports a building and transfers its load to the ground. It ensures the stability and longevity of any structure by anchoring it securely and preventing settlement or movement. There are various types of foundations, including slab, crawl space, and full basement, each chosen based on soil conditions, climate, and building design.

No! Gravel pads also make great gazebo foundations, hot tub pads, patio/fire pit areas, and more! A gravel pad with stone dust (instead of 3/4″ stone) is a great option for a horse row barn or run-in shed foundation. Feel free to contact us with questions about whether a gravel pad is right for your needs!

You can request a price list with sample pricing for some of the common shed foundation sizes here! Prices are dependent upon your garage or shed site being within 8” of level. (If the pad is more than 8” off level, additional charges may be applied by the site crew on the day of work being done)

  • Pad Between 8” to 14” Off Level – Add 20%
  • Pad Between 14” to 20” Off Level – Add 30%
  • Pad Between 20” to 26” Off Level – Add 40%
  • Pad More Than 26” Off Level – Custom Quote

For shed pads that exceed 26” off level, we recommend an upgrade to a 6×6 perimeter. While not required, this will add significantly more strength to your gravel shed foundation.

Yes, fabric weed barrier comes standard on all our gravel shed pads. We believe it provides extra stability to your shed foundation by separating the gravel from the dirt below. Some of the features and benefits of our commercial-grade fabric weed barrier include:

  • Made from high-quality, non-woven polypropylene fibers
  • Prevents weeds from growing over covered areas
  • Great for filtration, reinforcement, separation, and erosion control
  • Helps to prevent clogging, extend drainage system life, and increase performance

Your gravel shed foundation should be 12″ wider than your shed all the way around. So an 8’x12′ shed should be installed on a 10’x14′ pad. For more information, read our article about why your gravel shed foundation should be 12″ wider than your shed.

If your shed is built with a wood floor, you should choose a gravel pad; a concrete foundation is ideal for a shed without a prebuilt floor. You can read an in-depth comparison of each type of foundation in our article: “Gravel vs. Concrete: Which Shed Base is Best for You?”

We don’t recommend installing your shed on blocks as this can create problems for your building down the road. Potential issues include: 

  • Floor joists are supported unevenly.
  • Possible settling over time.
  • Binding windows and doors.
  • Space for critters to get under the shed.

In fact, many shed companies now require that their buildings be placed on a gravel shed foundation in order for their warranty to stand.
This article explains why shed foundation blocks are a bad idea in more detail.

Yes, rubber mulch tends to be more expensive than traditional mulch. This is because its materials take longer to produce and are treated to retain color. In addition, the upfront cost may be higher, but rubber mulch tends to last longer and has natural benefits such as pest control and weed suppression that are better compared to traditional mulch.  

Yes, maintenance practices such as inspecting for debris, fluffing and redistribution, and weed control are essential to guarantee the rubber mulch pads’ longevity.

Generally, rubber mulch pads are resistant to weather and erosion. Product quality, rubber mulch installation, and maintenance contribute to its ability to withstand erosion and various weather conditions.

Rubber mulch pads can experience some fading or color change over time, but they retain their color longer than organic mulch. Factors such as UV and weather exposure, product quality, and maintenance frequency can contribute to color change or fading in rubber mulch pads. 

Rubber mulch pads are considered safe for children and pets when used properly and in accordance with manufacturer guidelines. 

They do not attract pests or insects like organic mulch or wood chips. Since they don’t offer the same food source or habitat, pests and insects tend not to be attracted to them. 

On average, rubber mulch pads can last 10 to 20 years or more. However, the exact lifespan of your rubber mulch pad depends on several factors, such as the quality of the product, environmental conditions, level of usage, and maintenance. 

Since rubber mulch isn’t made from organic materials, it tends to be more durable, last longer, and suppress weeds better. However, unlike traditional mulch, it doesn’t retain moisture, which promotes plant growth and can be bad for the environment if not properly disposed of at the end of its life. 

Proper installation is crucial for rubber mulch to stay in place. The rubber mulch installation should include edging around the area and anchor pins, which should be done in layers. With decades of experience in the industry, Site Prep will ensure that your rubber mulch pad is installed properly and stays secured in place.

Before adding rubber mulch, add weed barrier fabric, edging around the area, or any additional features needed for increased drainage or soil preparation. We make sure to include weed barrier fabric in our rubber mulch installation process. 

Artificial turf pads do not prevent weed growth alone. When installed with base layers such as gravel and geotextile fabrics, the entire turf pad system works together to combat weed growth. That’s why we include a base layer and a weed fabric barrier in our artificial turf pad installation process. 

Yes, artificial turf pads can be recycled.

Yes, artificial turf pads help promote improved water drainage. We install our artificial turf pads with a weed fabric barrier that also improves drainage. 

In general, high-quality artificial turf pads tend to last 8 to 15 years or more. The specific lifespan of your artificial turf depends on the quality of materials, frequency and intensity of use, environmental conditions, maintenance practices, and installation quality.  

Having a sturdy base and sub-base layer under artificial turf is essential. We recommend a gravel foundation for a sturdy base underneath your artificial turf pad.

Artificial turf pads are generally a safe option for children and pets. However, factors such as chemical composition and heat retention should be considered. While their shock absorption capabilities can prevent injury, it’s also important to ensure that the turf doesn’t get too hot or that the pad is non-toxic. 

Artificial turf pads require minimal maintenance compared to natural grass. Typical maintenance includes regular cleaning, fluffing and brushing, and inspection for any weed growth, odors, or areas of poor drainage. 

Artificial turf pads can be installed on various surfaces, such as soil, asphalt, concrete, gravel, and decking. To determine which surface is right for your artificial turf pad, please contact us, we’d be happy to help!

Wood chips aren’t the best choice for wet or flood-prone areas. They are more susceptible to moisture and water retention leading to waterlogging and other potential damage. 

Wood chips don’t inherently resist pests and insects, but certain types have natural properties that can deter them. Wood with oils, tannins, and resins have insect-repellent properties. Hardwood chips such as oak or cedar are better at deterring pests than softwood ones like pine or spruce. 

Yes, wood chip pads require maintenance to ensure their longevity, effectiveness, and visual appeal. Common maintenance includes replenishing the chips, weed control, removing debris, monitoring moisture levels, inspecting for damage, and re-edging or containing them as needed. Feel free to contact us if you have any questions about how to maintain your wood chip pad.

Wood chip pads are suitable for projects such as swing set bases, under-deck areas, dog yards, garden mulch, walkways, and landscaping. Contact us if you want to learn more about what types of projects our wood chip pads can be used for.

Generally, wood chips can last several months to a few years before requiring replenishment or replacement. However, factors such as the type of wood, environmental conditions, application, thickness of the wood chip layer, and maintenance can all affect how long wood chips last.

Yes, wood chips can be good for drainage. However, they must be a larger size, as fine wood chips or sawdust may become compacted, reducing drainage.  It’s also important to consider soil composition and application depth to ensure better drainage. 

Wood chips can lower soil pH over time as they decompose. Depending on the types of plants you want to grow, this can affect soil fertility and plant growth. However, you can combat this by selecting hardwood chips that decompose more slowly, adding lime or other pH-raising amendments, monitoring the soil pH, and selecting plants that would thrive at that pH level.

Concrete piers are an excellent choice for supporting elevated structures. Since they extend deep into the ground to reach stable soil, they offer solid and reliable support for an elevated structure. In addition, they can be customized to be any size, making them excellent for making your structure as elevated as you need for possible flooding or pest control. 

Yes, in fact their design makes them perfect for any structure being built on poor soil conditions. These vertical columns are built to extend as deep into the soil as possible to find an area with strong soil or bedrock. With concrete piers, you can rest assured that your foundation will be stable and last for a long time.

The size of concrete piers that you’ll need will depend on the structures diameter, the necessary depth, and spacing. So for a small deck that’s 10×20’ and has an average bearing capacity, the diameter is 12 to 18”, the depth of the piers is 24 to 36”, and the piers are to be spaced 6’.

A concrete pier is a vertical column-like support that is driven deep into the ground to find stable soil conditions while a concrete foundation is a flat horizontal structure that provides widespread support. Concrete piers are typically selected for projects being built on unstable soil or uneven terrain while foundations are better suited for projects being built on already stable ground.

To figure out how many piers you need for you foundation, determine the perimeter and interior support line. For example, if you have 24×36’ house and are spacing the piers 8 ft apart, for the two long sides (36/8) you’ll need 4.5 or 5 piers each, so 10 in total. For the two short sides (24/8 = 3, round up to 4), you’ll need 4 piers for each side, or 8 piers in total. If you need interior support (36/8), you’ll need an additional 5 piers, so you’ll need a total of 23 piers for this structure. 

Yes, concrete piers are a highly effective solution when trying to install a foundation on a slope or in areas with weak soil. If you’re foundation needs concentrated support or needs to be grounded in stronger soil, concrete piers will ground it deeper in the right soil to ensure stability. You won’t have to worry about your foundation not being supported.

While both footings and concrete piers are designed to help distribute the weight of a structure evenly, footings serve as the base for foundation walls, concrete piers, or columns. Footings focus on spreading the weight across a larger area while piers target the load down deeper to more stable soil. These two items typically work in tandem. 

The depth of a concrete pier depends on the soil conditions, load requirements, frost line considerations, and the building codes in your area. Typically, concrete piers should be 36 to 48” deep in regions with frost and 12 to 24” in non-frost areas. All our concrete piers are 30 to 36” deep ensuring that they’re fit for either climate condition. 

For an average size foundation of 16×24, the typical cost is $4,000. However, the exact cost will depend on your project’s size and scope. You can request a price sheet from us that includes different foundation sizes. 

Concrete foundations typically take 28 days to cure when the concrete reaches its highest strength. The curing process at minimum should last 7 days. 

A concrete slab foundation is a single layer of concrete that’s typically 4 to 6” thick while a concrete pier foundation consists of multiple columns spaced at intervals to support the structure’s weight. The main difference is that concrete slabs distribute weight evenly and concrete piers transfer the load across designated points. Also, slabs are better in areas with even soil distribution while piers are better suited for uneven terrain. 

The lifespan of concrete foundations depends on soil conditions, foundation quality, maintenance, materials used, and other factors. Generally, most concrete foundations last 50 to 100 or more years as long as they’re well-constructed and properly maintained.

The depth of a concrete foundation depends on a number of factors such as frost line considerations, soil type, the load the foundation will bear, and your local building regulations. Typically, the minimum depth of your concrete foundation should be 12” below the ground and below the frost line in colder climates. 

The best type of concrete foundation depends on the type of project you’re looking to complete. There are several different concrete strengths, and the best one to use for your foundation will depend on what you’re looking to build.

You can prevent your concrete pad from cracking by including proper reinforcement, such as rebar and wire mesh, following the proper curing process, and using the appropriate concrete mix for the climate and load. We’ll work with you to ensure that your concrete pad includes everything it needs. 

A concrete pad can last 30 to 50 years or more if properly installed and maintained. At Site Prep, we use our decades of experience laying concrete to ensure you have a pad that will stand the test of time.

This process ensures that the concrete remains moist for long enough to be at full strength and prevent it from cracking. Typically, concrete needs to remain moist for at least a week. However, the entire curing process can take up to 28 days.

This also depends on the size of the pad, its intended use, and the weight of what it’s holding. If your concrete pad will be larger and support heavy loads, or you want to prevent cracking, you may want rebar or wire mesh.

The depth of a concrete pad depends on several factors, such as its intended use, weight distribution, local building regulations, and weather conditions in your area. Generally, patios and walkways should be 3 to 4 inches deep, and driveways, garages, and shed foundations should be 4 to 6 inches deep.

You don’t need a concrete pad for a shed. However, you will want your shed placed on a stable, level, and durable surface. A concrete pad is one of the best options because it supports heavier objects, meaning it can accommodate a shed of any size. You could also place your shed on a gravel pad or foundation or a concrete pier.

Whether you need a permit to pour a concrete pad depends on the project’s size and scope, as well as your local building codes and zoning regulations. Smaller concrete pads, such as those for a small garden shed or patio, may not require a permit. However, those used for larger structures such as garages, sheds, and hot tubs often do.

A hot tub doesn’t need a concrete pad but requires a stable, level, and durable foundation. A concrete pad is one great option due to its durability and level surface, but you could also place your hot tub on a gravel pad.

That depends on the size and scope of the project. On average, it takes us about 1-3 days to prepare the site and pour the concrete for a 16×24 foundation.

To prep the site before pouring concrete, there are a few steps we take:

  1. Excavating the site, leveling, grading, compacting the soil, and pouring the footers.
  2. Laying block walls for the sub-base layer
  3. Adding gravel as the sub-base
  4. Adding a vapor barrier

It is cheaper to add gravel to an area than to pave. Gravel typically costs $1-$3 per sq ft while paving materials cost anywhere from $3-$10 per square foot.

Putting gravel under your deck is a great idea if you want to prevent water pooling and weed growth. It can also be a great choice if you want to perform less maintenance and discourage pests, especially if you have a wooden deck. However, it’s completely up to personal preference, and you don’t have to put gravel under your deck if you don’t want to.

Gravel driveways can be a cost-effective and practical choice, but they can also pose potential risks to your car, such as tire wear and tear, dust and dirt, paint and windshield chips, undercarriage damage, and more. As long as you select the right type of gravel, perform regular maintenance on your driveway, and take other protective measures for your car, gravel shouldn’t be a bad option for your driveway.

On average, our gravel areas tend to be 4 inches thick, but the exact depth will depend on the project you’re looking to complete. We’ll work with you to ensure that your gravel area is the proper depth for the project you’re planning.

Gravel patios are a great idea for many homeowners as they offer several benefits, such as aesthetic appeal, a low initial cost, excellent drainage, and quick installation. However, whether they’re right for you depends on your specific needs, preferences, and circumstances.

Pea gravel is not typically suitable for supporting heavy structures alone. However, it can be part of a foundation system for larger structures. For example, it can be placed on top of a crushed stone or gravel base layer.

You can install pea gravel on a slope; however, to ensure stability, several factors must be considered. These include ensuring the area is level during excavation, retaining walls or edging to hold it in place, and selecting the right base material.

If you include a weed barrier, maintaining pea gravel pads is as simple as raking occasionally to keep the area smooth and prevent weeds from springing up. If not, it may also include occasional weeding.

While you can pea gravel on dirt, we don’t recommend it as it isn’t good for long-term stability and performance.

You can choose any material to put down as a base layer under your gravel. Materials like geotextile fabric prevent weed growth and promote drainage while crushed stone or rock provides additional stability and aids in weight distribution. Whatever material you choose, make sure it addresses your concerns about your pea gravel pad.

No, you don’t need to use a weed barrier underneath your pea gravel pad. However, we highly recommend one if you want to lessen the maintenance required for your pea gravel. A weed barrier will naturally weed for you, preventing the upkeep required and saving you time and effort.

The depth of your pea gravel pad depends on what you’re using it for and how much weight it needs to support. If you’re constructing a gravel patio or walkway, typically a depth of 2 to 4 inches works. For larger projects like a driveway or parking pad, a depth of 4 to 6 inches or possibly more may be better suited to ensure stability.

No! Gravel pads also make great gazebo foundations, hot tub pads, patio/fire pit areas, and more! A gravel pad with stone dust (instead of 3/4″ stone) is a great option for a horse row barn or run-in shed foundation. Feel free to contact us with questions about whether a gravel pad is right for your needs!

Absolutely. We don’t recommend using shed foundation blocks for your shed base as they can cause structural problems in your building as time goes on. Learn more in our article about shed foundation blocks.

Many areas require a permit for construction projects like installing gravel pads. Depending on the area you live in and their local building codes or zoning regulations, you may or may not need a permit. It’s important to visit your local building department’s website to find out whether you need a permit.

A gravel pad can support a large or heavy shed, but that all depends on a number of factors such as the type of gravel, thickness and compaction of the pad, size and weight of the shed, and what the area it’s being built on can support. If you want to know if we we can construct a gravel pad that can accommodate your shed size, feel free to contact us, we’d be happy to help!

Yes, you can install a gravel pad on a slope, but it will require additional materials and time to ensure stability and proper drainage. We recommend our premium and deluxe stone foundations if you’re planning to put your gravel pad on a slope as they already include the materials you’ll need.

The size of your gravel pad should be 12” wider than your shed all the way around, so if you have a 10×10 shed you’ll need enough gravel to accommodate a 12×12 pad. If you’re interested in more depth information on why your gravel shed foundation should be 12” wider than your shed you can read this article. 

Typically our gravel pads are 4 inches thick, but the actual thickness can vary depending on the size and weight of the structure, soil conditions, and local building regulations.

Generally, it takes us less than a day to install a gravel pad, but installation time can vary depending on the size and scope of your project. Our goal at Site Prep is to have your gravel pad installed as soon as possible.

On average, our gravel pads cost around $2,500. The exact cost of a gravel pad depends on whether your structure is within 8” off level. If the pad needs to be more than 8” off level, additional charges may apply. For more detailed information on the cost of a gravel pad, you can request a price list that includes some of our most common foundation sizes.

Site clearing refers specifically to the part of site preparation that includes removing an old structure, vegetation, debris, soil, and roots from the area before beginning construction.

Site preparation includes everything needed to prepare a site for construction. This entails removing an old structure, clearing the site of vegetation and debris, surveying and staking the ground, grading and excavation, and more. If you want to know more about site preparation, contact us, we’d be happy to help.

We install foundations for sheds, garages, houses, pole barns, horse barns, and gazebos. We’re happy to help with any foundation project, so contact us to find out if we can do it!

The time it takes to install a foundation depends on the size and scope of your project and the type of material you plan to use. On average, our gravel foundations take less than a day to complete, and our concrete foundations take 1-3 days to install.

If you’re looking to upgrade your backyard yard, but are looking for an idea that requires minimal upkeep consider xeriscaping, adding artificial turf, a patio or deck, or a mulch bed.

There are many ways to transform your backyard into a more stylish, functional space for relaxation, entertainment, and other outdoor activities. Some of the ways in which you can upgrade your backyard include adding a swingset for your children, a hot tub or pool, a gazebo, shed, or fire pit area.

The cost of a swingset base will depend on the size and scope of your project and the material you choose for your base. Request a price sheet for more detailed information about the costs of different bases.

Not all swingsets require a base, however, they should include some support or anchoring to ensure they don’t tip over. This can include concrete footings, gravel or mulch bases, and more.

The time it takes to build a base for a playset will depend on the type of base you choose. A pea gravel pad typically takes us a day to complete. Contact us to find out how long it will take to install our other bases.

It can be cheaper to build your own swingset rather than buying a pre-built one. However, whether it’s cheaper depends on the materials you choose, the complexity of the project, if you have the necessary tools it takes, and how much time it will take to build.

We understand that safety is the most important consideration when choosing a base for your children’s swing set. That’s why we recommend a rubber mulch pad, wood chip pads, artificial turf pads, or pea gravel pads. While all these options have different benefits and drawbacks, they’re all made for shock absorption, reducing the risk of injury.

To fix potholes in a gravel driveway, you’ll need gravel or crushed stone, a shovel, a rake, a compactor, a wheelbarrow, and water to moisten the gravel. You can then fill the holes with additional gravel and compact them to create a level surface. At Site Prep, we’ll help you maintain your driveway whether that’s refreshing it or filling in potholes.

The typical depth of a gravel driveway is 4 to 6 inches, however, the exact depth will depend on the soil conditions, expected traffic, and local climate conditions.

The estimated cost of a 100-foot gravel driveway is between $500 to $1600 depending on the type of gravel chosen, material costs, delivery fees, labor costs, and other additional costs. Contact us to find out how much it would cost us to install a 100-foot gravel driveway.

Yes, gravel tends to be cheaper than concrete.

The best type of gravel for a driveway depends on the climate conditions in your area, the amount of traffic, and your visual preference. We highly recommend crushed stone as it serves as a good option for both the base and surface layer of your driveway and is suitable for supporting vehicles without shifting.

If your gravel driveway is installed correctly and well-maintained, it can last 10 to 20 years before needing to be refreshed. On that note, if it is properly installed and maintained and is replaced as needed, it can last a lifetime.

Gravel parking lots can help prevent flooding due to their natural permeability, which leads to quicker absorption and better drainage. However, it’s important to remember that they’re not the end-all-be-all solution. You may need to include French drains or permeable pavers to aid drainage.

The cost of a gravel parking lot will depend on the size and scope of the project as well as the type of gravel chosen. You can check out our gravel pad page to find out what an average gravel pad costs or request a price sheet to determine how much your size parking lot will cost.

The typically recommended depth for a gravel parking lot is 10 to 18 inches. However, this may vary depending on expected load and traffic as well as soil conditions.

The most cost-effective material for a parking lot is gravel. Not only is the material itself affordable, but gravel is also easy to install. Gravel requires minimal maintenance as well, only needing periodic leveling and refilling as it gets pushed into the ground.

The best type of gravel for a parking lot will depend on its durability, functionality, and required maintenance. There are several different types of gravel to choose from. However, crushed stone is one of the best choices because of the variety of shapes and sizes of stone interlock to create a sturdy surface capable of supporting several vehicles.

To maintain the gravel under your deck, you’ll need to do a few things, including regularly raking it, weed control, and inspecting drainage. We’re happy to help you maintain any under-deck area we put in for you. Contact us if you’re having any trouble with drainage or weeds.

The best gravel under your deck depends on climate, drainage needs, and personal preference. We offer both pea gravel and crushed stone, which promote drainage and aesthetic appeal.

Putting a material like concrete or gravel will help keep your under-deck area dry. You can also include a weed barrier fabric topped with gravel to promote drainage and prevent water buildup.

In general, a thickness of 4 to 6 inches is recommended for effective drainage, prevention of moisture buildup, and the creation of a stable base. However, the exact thickness will depend on soil conditions, drainage requirements, intended use of the area, and local building requirements.

Gravel is a great option for your under-deck area. It provides excellent drainage, which is especially important if you have a wooden deck, as it prevents moisture damage and rot. It also can help prevent erosion in areas with poor soil conditions and make it easier to access your under-deck area by creating a level surface.

The common guideline for how far away a fire pit should be from a house, garage, or any other building is 10 to 20 feet. However, the specific distance will depend on local building codes and regulations as well as HOA guidelines.

The best place to put a fire pit will depend on safety and your personal preferences. Some of the best places to put a fire pit include a backyard patio, deck, or lawn, a campsite, or by the pool.

Yes, you can put gravel in the bottom of a fire pit as long as their resistant to high heat.

To accommodate a standard-size fire pit that’s around 3 feet and provide extra room for seating, a 10-foot diameter in total, 40 bags of pea gravel will be required. However, the actual number of bags you’ll need will depend on the size of your fire pit and the amount of room you want for seating.

The best gravel for a fire pit seating area will depend on whether or not it’s durable, comfortable to walk on, and capable of withstanding high temperatures. Pea gravel fits this bill, although you’ll want to have edging and compacting done to prevent shifting. Crushed gravel is another good option, it’s more stable than pea gravel but also less comfortable than it.

Yes, pea gravel is a great choice for a fire pit area for several reasons, including its smoothness, which makes it comfortable to gather on, and its good drainage, which prevents water damage. It’s also an affordable option that’s easy to install.

To harden a pea gravel patio, you’ll need a binding agent or stabilizer, rake, shovel, and water if required by the binder. Once the area has been excavated and the pea gravel has been spread to where you want it, you can add the binding agent all over the patio. After giving it time to cure, compact it with a plate compacter.

The pea gravel needed for a 10×10 depends on its planned depth. Most pea gravel patios are around 3 inches, so for a 10×10 pea gravel patio with a 3-inch depth, you’ll need 0.93 cubic feet of gravel.

The cost of a gravel patio depends on its size and the type of gravel you choose. Request a price sheet to determine the cost of a certain-sized gravel patio.

The depth of a gravel patio will depend on the type of gravel used, expected foot traffic, and soil conditions. For lighter-traffic areas, a depth of 6 inches should suffice, while for heavier foot traffic, a depth of 8 to 10 inches is recommended.

Yes, a gravel patio does need a base layer. It’s essential for stability, drainage, and weed control which all contribute to the longevity of your patio.

There are several materials to choose from to create a stable sub-base for your gravel patio. We recommend a weed barrier fabric to prevent weeds from growing and a crushed and compacted stone sub-base for added stability.

There is no definitive answer about what type of gravel is best for a patio; it’s all about personal preference. A pea gravel patio is a great option for a more aesthetically pleasing patio that’s easy to walk on but isn’t the best for a high-traffic area. Crushed stone is more supportive but isn’t as comfortable to walk on.

The cost of a dog turf yard depends primarily on its size, but access, slope, and other factors also play a role in determining final price. Request a free quote to get specific pricing for your dog turf yard project.

The size of your turf yard will depend on your dog’s breed and size, the yard’s intended use, and your personal preference. For an average-sized dog, you’ll want it to be a minimum of 200 to 400 square feet. However, you’ll probably want more room for an exercise area.

Artificial grass can be difficult to maintain, retain heat, and dispose of. While it requires less maintenance than natural grass, cleaning up debris or pet waste is important. In addition, it retains heat, which can make it too hot to touch in warm months. Finally, because turf yards are artificial, they are potentially harmful to the environment if not properly disposed of.

We recommend having a solid base layer, some sort of drainage system, and a geotextile fabric to ensure the longevity, safety, and ease of maintenance of your turf yard. That’s why we include a crushed stone base layer and a weed barrier fabric in our artificial turf yard for dogs.

Yes, turf is a good idea for dogs. It offers a number of benefits such as increased cleanliness, enhanced safety from insects and unwanted objects, extra softness and comfort for your dog, and it helps keep your dog’s health in check.

Installing a pool pad on uneven ground is possible, but the specific course of action will depend on the area’s unevenness. The ground can be leveled to accommodate the pool pad if the unevenness is minor. If it’s more extreme, retaining walls or adjustable supports may be necessary. Contact us, and we’ll recommend the best course of action for your specific needs.

The cost of an above ground pool pad will depend on the pool’s size and weight and the type of material you select for your base. Request a price sheet to find out how much a pad will cost based on its size and the material you choose.

You don’t need a concrete pad for an above ground pool, but you should have some sort of base to keep it protected, level, and stable. Concrete can be a good option as it’s long-lasting, durable, and easy to maintain.

A pool pad is a great idea as it provides stability, protection, and longevity for your new above ground pool.

Consider several factors when determining the best pad to put under your above-ground pool. These include the pad’s leveling and stability, protection, comfortability, and insulation. Artificial turf can provide more comfort, while gravel and concrete are better for leveling and stability.

A hot tub pad should be big enough to provide some extra space outside of the dimensions of your hot tub and meet the clearance requirements in your area. For an average sized 7×7’ hot tub, the base should be at least a foot longer on each side, so 9×9’.

A concrete pad is not necessary for a hot tub. You could select another base option such as gravel or artificial turf. However, it can be a good option if you want a long-lasting stable base for your hot tub.

Typically, gravel is the most affordable option for a base to put your hot tub on. However, the most cost-effective base will depend on the specific needs of your hot tub base.

The kind of pad you’ll need for your hot tub will depend on its size and weight, where it’s being placed, and your budget. Common options include a concrete or gravel pad.

Yes, it’s a good idea to put a pad under your hot tub so that it stays level and stable, protects it from damage to the bottom, and prevents moisture damage by creating a barrier between it and the ground.

Excavated materials can be disposed of or recycled in several ways, including reusing them on-site, off-site disposal, recycling, and more.

It’s difficult to give an accurate estimate of the cost of commercial excavation, as it can vary widely depending on the size and scope of the project and other factors. If you want to know how much your commercial excavation project will cost, contact us so we can help.

The time it takes for commercial excavation to be completed depends on the size and scope of the project. Some may only take a week while others may take a few weeks.

The three main types of excavation are topsoil, earth, and rock. Topsoil excavation entails removing any vegetation and the uppermost layer of soil. Earth excavation involves removing the layer of soil immediately below the topsoil. Finally, rock excavation includes removing hard materials such as solid rocks or boulders.

Commercial excavation is the process of removing materials from the site and any other work required to prepare it for the installation of commercial buildings or infrastructure. Commercial buildings include office buildings, shopping centers, hotels, and warehouses.

Typically, residential excavation can take around one week to complete. The exact duration of the residential excavation process depends on the size and scope of the project as well as the contractor you choose for the job. Feel free to contact us to get an estimate on how long it’ll take us to complete.

To calculate the cost of excavation, you’ll need to determine the volume of excavation, the type of material you’re using, labor and equipment costs, and any other additional costs the process may entail. If you need help calculating the cost of excavation, feel free to contact us!

The excavation process for a home typically involves clearing the area of any soil, debris, or vegetation, digging for a foundation, ensuring proper drainage, compacting and stabilizing the soil, and adding any necessary utilities such as sewer systems.

While both digging and excavation involve removing dirt, vegetation, or other earth materials, digging tends to be a smaller-scale project. Excavation typically requires more extensive planning.

The three main types of excavation are topsoil, earth, and rock. Topsoil excavation entails removing any vegetation and the uppermost layer of soil. Earth excavation involves removing the layer of soil immediately below the topsoil. Finally, rock excavation includes removing hard materials such as solid rocks or boulders.

The amount of time it takes to demolish and remove a shed depends on its size and material, quality, accessibility, and whether there are any utilities connected to it. A small shed typically takes between 2 and 4 hours, a medium-sized shed can take between 4-6 hours, and a large shed can take up to a full day.

The cost of shed demolition and removal will depend on the size of your shed, the scope of the project, permit fees, and disposal fees. The typical cost to remove a small shed ranges from $300 to $800, for a medium-sized shed it’s between $500 to $1,200, and for a large shed it costs between $1,000 to $2,500.

Yes, you can dismantle and move a shed. This process requires carefully taking apart the shed so that the materials can be moved and reassembled in the new location.

You can demolish a shed yourself, but following all the necessary safety precautions and steps is important. Demolishing and removing a shed can entail purchasing several new tools, disconnecting utilities, and following proper disposal regulations. It can be a difficult process to undertake on your own so you may want help from a professional.

If you want to get rid of an old shed, you’ll need to dismantle the structure and dispose of the materials. If gathering all the necessary materials and demolishing and removing the shed yourself feels overwhelming, Site Prep specializes in shed demolition and removal and would be happy to help. Contact us to get started!

The time it takes to construct a gazebo foundation will vary depending on the size and scope of the project and the material you choose for your foundation. Most gravel foundations take us only a day to complete while concrete foundations typically take a few days.

The cost of a gazebo foundation depends on the size and scope of your project and the material you choose. If you’re curious to know the exact cost of your gazebo, you can request a price list that covers specific foundation sizes. Depending on whether you choose a concrete or gravel foundation, those pages will have more insight into the exact cost as well.

    Yes, a gazebo should have a stable, durable base to maintain the structure. You don’t have to choose a specific foundation; there are several different materials to choose from.

    Gravel is the most cost-effective base for a gazebo. It’s easy to install and requires minimal maintenance, making it less expensive than concrete.

    The typical depth of most footings is 36 to 48 inches. However, the depth of your gazebo footings will vary depending on your local building codes, climate, the frost line, soil conditions, and the size and weight of your gazebo.

    Constructing a pole barn foundation takes anywhere from a few days to a few weeks. The project’s exact duration depends on the building’s size, the material used, site preparation, and weather conditions. To get a better idea of how long your pole barn foundation will take, visit our concrete and gravel foundation pages to see how long those projects typically take.

    The cost of a pole barn foundation depends on its size and the material you choose. Check out our gravel and concrete foundation pages to get a better idea of how much your pole barn foundation will cost.

    A pole barn does not require a typical continuous foundation, but it should have concrete piers at each bearing wall to provide support and a stable base. If you’re still unsure if a foundation is necessary for your pole barn, you can contact us to learn more.

    The thickness of the concrete slab can be determined by the intended use of the building and the load it will bear. For a small structure that will get light use out of the slab, the concrete should be 4 inches thick. For a medium structure with medium use, the concrete slab should be 5-6 inches thick. For a large, heavily used structure, your concrete slab should be 6-8 inches thick.

    Whether you’ll need footings for your pole barn foundation depends on the soil conditions, the size of the structure, your local building codes, frost protection, and the permanence of your structure. Typically, you’ll want footings for pole barn foundations on poor soil, large or heavy structures, in areas with freeze-thaw cycles, and for a permanent foundation. Footings ensure that your pole barn foundation is durable and stable and will last a long time.

    It typically takes us a few days to build a concrete foundation, but the actual duration of the installation process will depend on the size and scope of your project.

    The cost of a house foundation will depend on the size and scope of the project. Visit our concrete foundations page to get a better idea of our prices or request a price sheet the covers specific foundation sizes.

    The depth of your house foundation will depend on the soil conditions, climate, and size of your home. Shallow foundations range from 4 to 18 inches deep while deep foundations are 7 feet to 10 feet below grade. Depending on where the ground freezes in your area or how deep you need to go to reach stronger soil, these numbers may vary.

    Foundations made from concrete are cheaper than those built from steel. However, the most affordable concrete foundation will depend on whether you choose a concrete slab, block, or piers.

    The best foundation for your house depends on soil conditions, climate, budget, and local building codes. Concrete foundations tend to be the most common type as they are long-lasting and durable. However, steel beams or piles can also be used to support your home.

    Constructing a gravel foundation typically takes only a few days, while constructing a concrete foundation may take a few weeks since concrete needs more than a week to cure. The exact duration of constructing a garage foundation will depend on the type of foundation you choose and the crew installing it. To find out how long it will take our expert crew to install you concrete or gravel foundation, visit our website.

    The cost of a garage foundation will vary depending on the type of foundation you select. A concrete foundation or pier will typically cost more than a gravel foundation. However, a gravel foundation is typically not suitable for parking vehicles. Check out our article for more information on how much a garage foundation will cost.

    Yes, a garage’s foundation is essential to ensure the structure is properly supported. The type of foundation required depends on local building codes, soil conditions, and the garage’s size and use.

    A gravel foundation is the most affordable option for a garage. However, this may not be ideal for parking vehicles. A garage with a gravel foundation is typically better for storage or as a workshop.

    The best foundation for a garage depends on several factors, such as soil conditions, local climate, budget, intended use of the garage, and personal preferences. Concrete foundations are the most popular base, as they are durable and offer a stable and level surface to park vehicles. Gravel foundations are a more budget-friendly option, but they are better for workshops or storage than parking vehicles.

    The depth of your garage foundation will depend on the type of foundation you’re planning to build. For a concrete slab foundation with no walls, the depth should be 4 to 6 inches. If the concrete foundation has walls, the concrete may need to be deeper to accommodate the additional height of the walls. For concrete piers, holes will need to be dug at strategic locations, and their depth will depend on how far down you need to go to reach better soil.

    We recommend following the shed anchoring requirements of your local municipality and/or your shed manufacturer.
    If your shed foundation includes concrete shed piers, you can simply anchor the shed to the footings using metal brackets. For gravel foundations, we recommend using a stake-and-cable anchoring system, which can be installed after the foundation is constructed and the shed is delivered.

    It depends on what your township or municipality requires. In most cases, a gravel foundation is sufficient to support a prefabricated shed with a built-in floor. However, if your township requires it, we can add concrete shed foundation piers to a gravel pad to create a foundation that drains well and meets local code requirements. You can see our complete guide to shed footings here.

    Yes, there are. However, we recommend gravel shed foundations due to their combination of affordability, durability, and ease of installation. 

    In some cases, local ordinances may require that gravel shed foundations be modified with frost-proof footings such as shed foundation piers. For even more foundation types, check out our comparison of the top 13 shed foundation options here.

    Most sheds need foundations. Even if it’s not required for the shed manufacturer’s warranty, a properly installed foundation will increase the life of your shed. 

    In general, you should always install a foundation for a shed that is larger than 8’x8’ or weighs more than 300 pounds (including contents). 

    You can learn more about whether your shed needs a foundation here.

    You certainly can and we know of many DIY enthusiasts who have done so. In fact, we created a detailed guide on how to build a shed foundation to help you. 🙂

    If you decide it’s not a project you want to handle alone, you can always request a free quote to have your shed foundation installed professionally.

    Our crews can help you determine the best shed location when they arrive on-site before they start excavation. Ultimately, you’re the one who will be using the shed on a regular basis, so you should make the final call!

    Here are a few considerations:

    • Usage – You’ll likely place the shed differently depending on whether it’s used for household storage, garden supplies, lawnmower storage, etc.
    • Lighting – If you want lots of natural light in the shed, keep it away from trees or taller buildings.
    • Local ordinances – Many towns and cities limit where a shed can be placed relative to property lines, roads, and existing structures. Be sure to check what your township requires.

    You can read more about how to choose a shed location here.

    We recommend ‘¾” clean’ stone and use it for all of our shed foundations. This stone is an excellent choice because it compacts tightly while still allowing great drainage around the shed.

    Absolutely! Commercial-grade woven fabric is standard on all our gravel shed foundations. We believe it provides a more stable base for your shed by separating the gravel from the dirt below. In addition, it also keeps pesky plants away from your building!

    Your shed foundation should be at least 4” deep and should extend 12” past your shed on each side (i.e., a 12×14 foundation for a 10×12 shed).

    The simple formula to calculate how much gravel you need for a shed foundation is:

    Length(feet)*Width(feet)*Depth(feet)=Total cubic feet 

    There are 27 cubic feet per cubic yard or approximately 21.6 cubic feet per ton of crushed stone (the two most common sales units). You can read more about how much gravel is needed for a shed foundation here.

    In general, 4” to 6” is a good depth range for a gravel shed foundation. Check with your local building department to make sure the foundation that you want to build meets local building requirements.

    Absolutely! There are two primary ways of building a shed foundation on uneven ground: 

    Alternatively, some types of sheds and other buildings can be supported with concrete piers built up from a slope, such as in this example.

    A gravel shed foundation should extend 12” past your shed in each direction. For example, a 10’x12’ shed would require a 12’x14’ gravel shed foundation. This article goes into more detail about why your gravel shed foundation should be larger than your shed.

    If you’re going with a concrete pad and your shed doesn’t have a floor, the foundation should be the same dimensions as your shed.

    Not technically. Gravel actually refers to round river stone, which is not suitable for a foundation. Our shed foundations are built with crushed stone. Crushed stone is ideal for a shed foundation because its uneven shape allows it to be tightly compacted into a firm base while still allowing water to drain away from the shed.
    However, many people refer to crushed stone as “gravel”, so we often do too!

    Yes, those terms can be used interchangeably. Our pads are built with crushed stone but are often referred to as “gravel” shed foundations, so we often refer to them that way as well.

    A crushed stone pad makes a better prefab shed foundation than a concrete pad for sheds with prebuilt wooden floors; concrete pads are recommended for garages or sheds without built-in floors.
    For sheds with built-in floors, stone pads are better than concrete for the following reasons:

    • Price – A stone foundation costs roughly ⅓ of what a similar concrete pad would cost.
    • Ease of installation – A stone foundation can often be installed in several hours.
    • Better drainage – A stone pad keeps drains moisture away from the base of your shed more quickly; water tends to puddle on concrete pads.

    You can read more about gravel vs concrete shed bases here.

    Yes! We provide all the materials and do all the grading work to prepare the site for your new shed. Basically, you just point out where the shed will go, and we’ll take care of the rest!

    Keep in mind that the slope of the site will affect the final cost due to the extra labor and materials required. Our crew will measure the slope when they arrive and make any necessary adjustments to the original quote before they begin work. Our pricing is adjusted for slope as follows:

    • Less than 8” of slope = Base price
    • 8”-14” of slope = Base price + 20%
    • 14”-20” of slope = Base price + 30%
    • 20”-26” of slope = Base price + 40%
    • Over 26” of slope = Contact us for custom pricing.

    You can read a general overview of how to level the ground for a shed here.

    The general steps for installing a gravel shed foundation are:

    1. We remove several inches of topsoil and make sure the ground beneath is well compacted.
    2. We build a perimeter of pressure-treated lumber around the foundation and stake it in place. This perimeter also serves to level the site if it is sloped.
    3. We add a construction-grade stabilization over the dirt to provide added durability and prevent weed growth.
    4. We add a minimum of 4” of crushed stone (known as ‘¾” clean stone’) and lock it in place using a power compactor.

    Then we clean up our tools, get out of your way, and you’re ready for your new shed to be delivered!

    It depends. Some of the main factors that influence shed foundation cost are:

    • Size – Larger foundations cost more in total but also have a lower cost per square foot.
    • Slope – Prices increase based on the slope of the site as shed foundations on grades require additional preparation work. Our pricing is adjusted for slope as follows:
      • Less than 8” of slope = Base price
      • 8”-14” of slope = Base price + 20%
      • 14”-20” of slope = Base price + 30%
      • 20”-26” of slope = Base price + 40%
      • Over 26” of slope = Contact us for custom pricing.
    • Location – We charge a mileage-based fee to cover our crews’ time and expenses while traveling to shed foundation jobs.

    You can request a price sheet with some sample shed foundation pricing here or learn about the factors that affect shed site prep cost here.

    Crushed stone (or “gravel”) shed foundations are the best all-around shed foundation option. While various shed foundation types are available, crushed stone foundations provide the best combination of affordability, durability, and ease of construction. In fact, many shed manufacturers now recommend or require a crushed stone base for their buildings, with some shed companies even making their warranties contingent upon it.

    To request an estimate on a job, use our free quote form. This form goes straight to our estimators and they will get back to you promptly with a quote on your job.


    For all other inquiries, you can use our contact form or call us at 717-799-7311.

    Always check the reviews of any contractor before you hire them! You can read reviews on a contractor’s website (ours are here), but you should primarily trust reviews from third-party sites that the contractor does not control. You can find our Google reviews here and our Facebook reviews here. We are fully insured and licensed to perform site preparation work. Our license number is PA118139.
    Site Prep was founded in 2014 when we saw a need for consistent, high-quality foundations for the prefabricated shed industry. From there, we grew our services to include a wide range of site preparation work. Over the years, God has blessed us with a great team and 1000s of wonderful customers who refer us to their friends and family. In fact, we were named to the 2021 Inc. 5000 list of the fastest-growing private companies in America! You can learn more about us, our mission, and our team here.

    Yes! You can see examples of our site preparation work in our recent jobs portfolio. We have photos from 100s of past jobs so you can get a broad overview of the type of projects we do.

    Our service area for most of our site preparation services includes: For some services, particularly our residential excavation services, we serve a radius of approximately 75 miles around Gap, PA.
    We provide a variety of services related to site preparation for residential and commercial structures. These services include:
    • Gravel pads – Typically used for shed foundations, but also used for hot tub padsfire pit areasgazebo foundations, and more.
    • Concrete foundations – Most commonly used for garages and other large buildings.
    • Residential excavation – This includes septic installations, house footers, final site grading, and more.
    • Swingset bases – Similar to our gravel pads, but with a top layer of wood chips for protection.
    • Shed demolition – We can get rid of that old shed or garage!
    • Drainage systems – Meeting code requirements for water runoff and drain management around new outbuildings.
    • Horse stall mats – These rubber mats protect animals in equine facilities.
    You can see all of our site preparation services here.
    We’ve tried to make the process as simple as possible:
    1. Submit your job details via our quote request form. You can also upload pictures of your site through this form, which speeds up the process and ensures the accuracy of your quote.
    2. Our estimators will put together a quote for your job and send it to you via email.
    3. When you’re happy with the quote, an initial deposit will secure your place in our job calendar.
    For more in-depth jobs (such as garage foundations or residential excavation work) we may also schedule an on-site visit to make sure we have all the necessary measurements and site details required for an accurate quote. Simple jobs (such as most shed pads) can be quoted using only photos of your site.
    Leave a Reply

    Your email address will not be published. Required fields are marked *